I read cooking magazines and cookbooks, and, every once in a while, I find something good. This recipe improves a recipe that I learned from a friend in New York City.
Recipe from bonappetit.com
Ingredients
- 8 ¾-inch thick slices crusty bread
- 6 tbsp olive oil, divided
- Salt and freshly ground pepper
- 2 garlic cloves, thinly sliced
- ½ tsp crushed red pepper flakes
- Two cans of 15 oz each of cannellini beans, rinsed
- 1 bunch kaleor mustard greens, ribs removed, leaves cut into bite-size pieces
- ½ cup vegetable or chicken broth
- 1 tbsp fresh lemon juice
Preparation
- Brush the pieces of bread on both sides with 4 tablespoons of oil total, and place in a large preheated skillet over medium heat.
- Working in 2 batches, cook the bread, pressing occasionally to enhance the crispiness until golden brown, which should take about 2-3 minutes per side.
- Season the toasted pieces of bread with salt and pepper, and set aside.
- Now, increase the heat to medium-high and heat the remaining 2 TB.s of olive oil in the same skillet. Add the thinly sliced garlic and red pepper flakes, and stir until fragrant. Then, add the cannellini beans, stirring occasionally, until they begin to blister, which should take about 3 minutes.
- Using a spoon, lightly mash half of the beans, and add kale and broth, tossing frequently until the kale has been wilted.
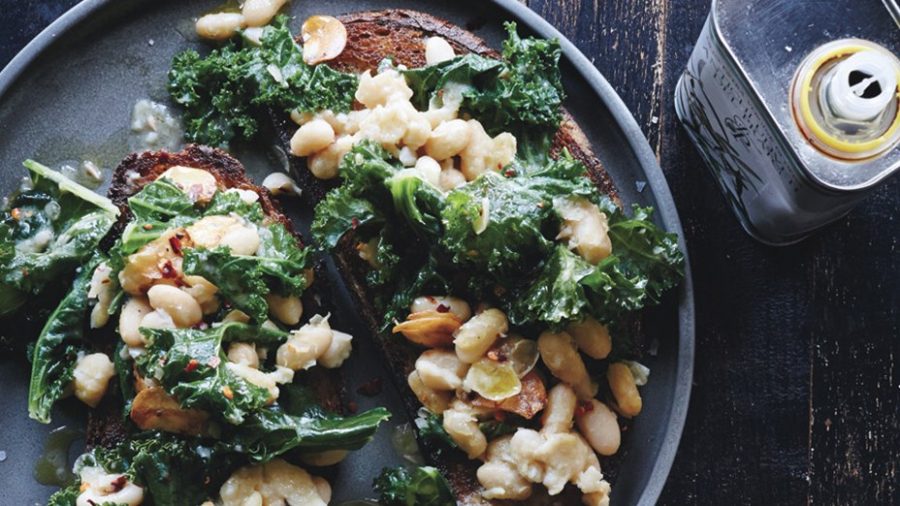
- Add lemon juice, and season with salt and pepper. Serve the now finished beans and greens mixture over the toasted bread.
Italiano: Bruschetta con fagioli e verdure
Leggo riviste o libri di cucina e ogni tanto trovo qualcosa di buono. Questa ricetta migliora quella che usavo prima che avevo imparato da un amico a New York.
Ingredienti
- 8 fette di pane croccanti, spesse 1 cm
- 6 cucchiai di olio d’oliva, diviso
- Sale e pepe macinato fresco
- 2 spicchi d’aglio, tagliati a fettine sottili
- ½ cucchiaino di peperoncino rosso tritato
- 2 lattine di fagioli cannellini sciacquati (800 grammi in totale),
- 1 mazzo di cavolo nero (1/2 kg), le foglie tagliate a pezzettini
- 250 ml di brodo vegetale o di pollo
- 1 cucchiaio di succo di limone fresco
Preparazione
- Spennellate il pane da ogni lato con 4 cucchiai di olio in totale e mettetelo in un’ampia padella preriscaldata a fuoco medio.
- Cuocere il pane, premendo di tanto in tanto per esaltarne la croccantezza fino a doratura, che dovrebbe impiegare circa 3 minuti per lato.
- Condire i pezzi di pane tostati con sale e pepe e mettere da parte.
- Aumentare la fiamma a medio-alta e riscalda i restanti 2 TB di olio d’oliva nella stessa padella. Aggiungere l’aglio tagliato a fettine sottili e le scaglie di peperoncino e mescolare fino a renderli fragranti, 1 min. Quindi, aggiungere i fagioli cannellini, mescolando di tanto in tanto, fino a quando non iniziano a formare bolle, circa 3 minuti.
- Usando un cucchiaio, schiacciare leggermente metà dei fagioli e aggiungere il cavolo nero e il brodo, mescolando spesso finché il cavolo non è appassito.
- Aggiungere il succo di limone e condire con sale e pepe. Servire fagioli e verdure sul pane tostato.
Photo from http://www.bonappetit.com/recipe/skillet-bruschetta-with-beans-and-greens
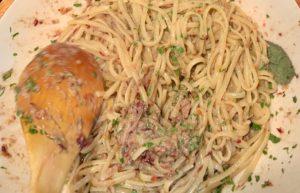 This pasta reminds me of summertime, with its lovely scent of orange and mint. It’s a recipe that can only be made in small portions, so don’t try to increase the measures in this recipe. It’s my friend