Michele-Carbone-New-Cover

Category: Side Dishes

5

“Sticky” Potatoes, or Patate Impacchiuse (for 4 people)

This is an old Calabrian recipe, and I love it. My guests love it, too. I often prepare this as a hearty appetizer, particularly when the weather is cool.

Use a cast-iron skillet that has a good-fitting cover.

Use yellow (Yukon) potatoes, cut in slices of about ¼ inch (½ cm).  Use 1 or 2 potatoes per person -depending on size of the potato, what else you are cooking etc.

Ingredients

  • 2 – 8 Yukon potatoes, sliced about ¼ inch.
  • 2 cloves of garlic, sliced.
  • 2 Tb. Extra virgin olive oil.
  • 2-3 hot peppers, for example Calabrian red peppers or Thai peppers.
  • Salt and pepper

Preparation

  1. Add olive oil to a large skillet and heat to medium.
  2. When the olive oil is warm, add the sliced garlic cloves.
  3. Allow the garlic to turn golden; then remove all the garlic, using a fork.
  4. Add the hot chili peppers and saute for a minute.
  5. Add the potatoes, mix them so that each has a light coating of olive oil, then fry on medium/high 2 to 3 minute per side (i.e., until they get a gold to slight brown patina on the outside, NOT black).
  6. Cover the pot and cook on low for about 15 minutes.  Do not stir or mix, let them stick (impacchiuse means sticky).  Mix the potatoes gently– -try not to break them—so that those that were on top go on bottom and cover again.  Continue cooking on low heat for another 10 minutes.
  7. Remove the lid, and if the potatoes released water and so there seems to be liquid in the skillet, cook on medium high 2 minutes per side until the liquid evaporates.
  8. Add salt and pepper to taste.

Enjoy!


Italiano: Patate Impacchiuse

Ingredienti

  • 2 – 8 potate, tipo “Yukon”
  • Sale e pepe a piacere
  • 2 spicchi d’aglio, schiacciati
  • 120 ml di olio extravergine di oliva
  • 2 – 3 peperoncino piccante calabrese italiano o, tritato (facoltativo) o altro Thai piccante, etc.

Preparazione

  1. Aggiungere l’olio d’oliva in una padella fuoco medio alto.
  2. Quando l’olio d’oliva è caldo, aggiungere aglio schiacciato.
  3. Lasciare che l’aglio diventi dorato; quindi toglierlo.
  4. Add the hot chili peppers and saute for a minute.
  5. Add the potatoes, mix them so that each has a light coating of olive oil, then fry on medium/high 2 to 3 minute per side (i.e., until they get a gold to slight brown patina on the outside, NOT black).
  6. Cover the pot and cook on low for about 15 minutes. Do not stir or mix, let them stick (impacchiuse means sticky).  Mix the potatoes gently– -try not to break them—so that those that were on top go on bottom and cover again.  Continue cooking on low heat for another 10 minutes.
  7. Remove the lid, and if the potatoes released water and so there seems to be liquid in the skillet, cook on medium high 2 minutes per side until the liquid evaporates.

Bon appetito!

Twice Baked Potato Skins

When I make gnocchi, I bake the Russet potatoes first on high heat (450º F). After removing them from the oven and allowing them to cool off enough to handle them, I peel them, reserving the peels in a large bowl. The skins are delicious when baked again with a combination of cheese, herbs, and even anchovies.

Ingredients

  • Potato skins from baked Russet potatoes

    Mushrooms From Oak Park Market 1

    Mushrooms, a red pepper, and parsley used in my twice-baked potato skin recipe

  • A Calabrian or Thai pepper, minced
  • A handful of minced herbs, such as rosemary, parsley, and sage
  • Olive oil infused with garlic
  • …any optional additions, such as anchovies, fresh mushrooms, and grated Parmigiano or Peccorino cheese

Preparation

  1. The first time I made the twice-baked potato skins, I sautéed some anchovies in a bit of extra-virgin olive oil, an Italian red pepper, rosemary, and garlic.
  2. I removed the garlic from the olive oil and mixed the oil containing the homogenized anchovy and herbs with the potato skins.
  3. I sprinkled them with some grated Parmigiano cheese, and then baked the mixture in a pre-heated oven (450º F) for 15-20 minutes. They were delicious!

Another variation…

  1. The next time I made the baked potato skins, I was out of anchovies and rosemary. But I had some wonderful fresh mushrooms, so I sautéed the stems with a bit of olive oil and an Italian pepper.
  2. I combined the olive oil and minced pepper with the mushroom caps, some sage, rosemary, and parsley, and then mixed gently with the potato skins.
  3. I baked the mixture in a 450º F oven for 15 – 20 minutes, and it was fantastic.


The bottom line is that baking the potato skins again with a combination of some of your favorite cheeses and herbs makes a winning appetizer or side for a dinner.

Giancarlo Gottardo’s Cold Octopus Salad

Octopus Salad alla Vucciria (for 4 to 6 people)

In my previous posting of how to cook octopus for soup, I suggested that it’s best to get a small octopus, because large octopus is too rubbery.  My good friend Giancarlo Gottardo taught me how to make even a large octopus tender and delicious.  Most American fish markets can provide you with fresh octopus, and they usually clean the inner organs, leaving the head and tentacles.

Octopus Salad

Michele’s version of the Polpo alla Vucciria

The Vucciria is the most famous open market in Palermo, Sicily.  Traditionally, the fishmongers there beat the octopus against marble counters to tenderize it, then cook it in large pots. When shoppers approach the counters, the fishmongers chop the octopus and serve it with a wedge of lemon. This recipe is Giancarlo’s elegant variation of the fresh, simple preparation of the Sicilian fish mongers.

The Vucciria is the most famous open market in Palermo, Sicily.  Traditionally, the fishmongers there beat the octopus against marble counters to tenderize it, then cook it in large pots. When shoppers approach the counters, the fishmongers chop the octopus and serve it with a wedge of lemon. This recipe is Giancarlo’s elegant variation of the fresh, simple preparation of the Sicilian fish mongers.

Ingredients

  • ½ to 1 cup of course sea salt
  • 1 large octopus – about 2.2 pounds
  • 6 whole lemons: 2 for juicing, and 4 which will be chopped for the salad
  • A handful of fresh Italian parsley, minced
  • 1 medium red onion, cut into thin slices


Dressing:

  • Juice two lemons
  • Extra Virgin Italian olive oil, approximately ¼ cup. The ratio of lemon juice to olive oil should be 1:1 (in other words, if the juice from the two lemons is ½ cup, mix it with ½ cup of extra virgin olive oil)
  • 2-3 TB of white vinegar, preferably white balsamic vinegar
  • 1 TB. fine sea salt
  • 1 teaspoon black pepper


Preparation

  1. Put the octopus into a large pan or bowl. Rub the coarse sea salt over the entire body of the octopus, massaging the salt into the skin for about 10 minutes.  You will see a foamy liquid start to release from the body.  Cover the pan and place the salt-covered octopus in the refrigerator for four hours.(Note: If you need to prepare this recipe a day ahead, you can complete the brining process on one day, then cook it the next day.  The key is that you cannot brine the octopus longer than four hours.  Once the four hours are up, you can rinse the octopus very well as described in step 3, then store in an airtight container until the next day, when you cook it, starting at step 4)
  2. While you wait for the brining process to complete, make the dressing and put it into a jar that you can shake to mix the ingredients just prior to serving the salad.
  3. After 4 hours of brining, put the octopus into a colander in your sink and rinse it very well with cold water, making sure all the salt has been washed from the skin.
  4. Place the rinsed octopus into a heavy pan and cover with cold water, making sure that all the tentacles are covered with water. Cook at a low temperature for 2 hours, until the meat is tender.
  5. Remove the octopus from pot and allow to cool on a large cutting board. Chop the octopus into half-inch pieces. If the octopus’s beak is still present, use a sharp knife to remove the beak.
  6. While the octopus is cooling, slice or chop the red onion. Peel the 4 lemons and cut into small pieces, avoiding the seeds and the rind.  Put them into a large serving bowl and add the minced parsley. 

Italiano: Insalata di Polipo (per 4 -6 persone)

Nella mia ricotta su come cucinare il polpo, ho detto che è meglio prendere un piccolo polpo, perché il grande polpo è troppo gommoso. Il mio buon amico Giancarlo Gottardo mi ha insegnato come rendere tenero e delizioso anche un grande polpo. La maggior parte dei mercati ittici americani può fornirti polpi freschi e di solito puliscono gli organi interni, lasciando la testa e i tentacoli.


Ingredienti

  • 2 -3 pugni sale marino, grosso
  • 1 polpo tra 1 – 1.5 kili
  • 6 limoni interi: 2 per la spremitura e 4 che verranno tritati per l’insalata
  • Una manciata di prezzemolo fresco italiano, tritato
  • 1 cipolla rossa media, tagliata a fettine sottili


Salsa:

  • Succo di due limoni
  • Olio extra vergine di oliva italiano, circa ¼ di tazza. Il rapporto tra succo di limone e olio d’oliva dovrebbe essere 1: 1 (in altre parole, se il succo dei due limoni è ½ tazza, mescolarlo con ½ tazza di olio extra vergine di oliva)
  • 2-3 cucchiai di aceto bianco, preferibilmente aceto balsamico bianco
  • 1 cucchiaio di sale marino fine
  • 14 cucchiaio di pepe nero


Come Prepare Questa Ricetta

  1. Coprite il polpo con un paio di pugni di sale e lasciate riposare in frigo 1 ora.
  2. Sciacquate bene, coprite con acqua fredda, mettete un coperchio pesante cosi che tutto il polpo è sott’acqua, tentacoli compresi, e cuocete a fuoco basso 2 ore, finchè tenero (più è grosso il polpo più ci vuole e viceversa).
  3. Tritate il polpo a pezzettini piccoli col coltello, tritate finemente una cipolla rossa media e mezzo mazzo di prezzemolo, e 4 limoni tagliati a fettine sottili e poi tritati –niente semi ne bianco ne buccia. Mischiate il tutto.
  4. Salsa: sugo di due limoni, mischiate 1:1 con olio d’oliva (cioè lo stesso volume di limone e di olio), 2-3 cucchiai di aceto bianco, sale e pepe.
  5. Mischiare la salsa con il polipo e portare subito a tavola.


Skillet Bruschetta with Beans and Greens

I read cooking magazines and cookbooks, and, every once in a while, I find something good.  This recipe improves a recipe that I learned from a friend in New York City.

Recipe from bonappetit.com

Ingredients

  • 8 ¾-inch thick slices crusty bread
  • 6 tbsp olive oil, divided
  • Salt and freshly ground pepper
  • 2 garlic cloves, thinly sliced
  • ½ tsp crushed red pepper flakes
  • Two cans of 15 oz each of cannellini beans, rinsed
  • 1 bunch kaleor mustard greens, ribs removed, leaves cut into bite-size pieces
  • ½ cup vegetable or chicken broth
  • 1 tbsp fresh lemon juice

Preparation

  1. Brush the pieces of bread on both sides with 4 tablespoons of oil total, and place in a large preheated skillet over medium heat.
  2. Working in 2 batches, cook the bread, pressing occasionally to enhance the crispiness until golden brown, which should take about 2-3 minutes per side.
  3. Season the toasted pieces of bread with salt and pepper, and set aside.
  4. Now, increase the heat to medium-high and heat the remaining 2 TB.s of olive oil in the same skillet. Add the thinly sliced garlic and red pepper flakes, and stir until fragrant. Then, add the cannellini beans, stirring occasionally, until they begin to blister, which should take about 3 minutes.
  5. Using a spoon, lightly mash half of the beans, and add kale and broth, tossing frequently until the kale has been wilted.
  6. Add lemon juice, and season with salt and pepper. Serve the now finished beans and greens mixture over the toasted bread.

Italiano: Bruschetta con fagioli e verdure

Leggo riviste o libri di cucina e ogni tanto trovo qualcosa di buono. Questa ricetta migliora quella che usavo prima che avevo imparato da un amico a New York.

Ingredienti

  • 8 fette di pane croccanti, spesse 1 cm
  • 6 cucchiai di olio d’oliva, diviso
  • Sale e pepe macinato fresco
  • 2 spicchi d’aglio, tagliati a fettine sottili
  • ½ cucchiaino di peperoncino rosso tritato
  • 2 lattine di fagioli cannellini sciacquati (800 grammi in totale),
  • 1 mazzo di cavolo nero (1/2 kg), le foglie tagliate a pezzettini
  • 250 ml di brodo vegetale o di pollo
  • 1 cucchiaio di succo di limone fresco

Preparazione

  1. Spennellate il pane da ogni lato con 4 cucchiai di olio in totale e mettetelo in un’ampia padella preriscaldata a fuoco medio.
  2. Cuocere il pane, premendo di tanto in tanto per esaltarne la croccantezza fino a doratura, che dovrebbe impiegare circa 3 minuti per lato.
  3. Condire i pezzi di pane tostati con sale e pepe e mettere da parte.
  4. Aumentare la fiamma a medio-alta e riscalda i restanti 2 TB di olio d’oliva nella stessa padella. Aggiungere l’aglio tagliato a fettine sottili e le scaglie di peperoncino e mescolare fino a renderli fragranti, 1 min. Quindi, aggiungere i fagioli cannellini, mescolando di tanto in tanto, fino a quando non iniziano a formare bolle, circa 3 minuti.
  5. Usando un cucchiaio, schiacciare leggermente metà dei fagioli e aggiungere il cavolo nero e il brodo, mescolando spesso finché il cavolo non è appassito.
  6. Aggiungere il succo di limone e condire con sale e pepe. Servire fagioli e verdure sul pane tostato.

Photo from http://www.bonappetit.com/recipe/skillet-bruschetta-with-beans-and-greens

Fennel and Orange Salad

This is a wonderful refreshing salad, typical of the South of Italy.  It goes very well after you eat any heavy food—pork, fish, whatever—to cleanse the palate and be ready for the next dish.  It is a constant in my twelve-course Christmas dinner, and it is always rated as one of the best dishes. It’s easy to make; I’ve never found someone who does not like it.

Michele Carbone fennel and orange salad

Our friend Ameilia prepared this beautiful presentation of fennels and oranges

Ingredients

  • 4 – 6 Naval oranges or better, “blood” oranges
  • 4 – 6 fennel bulbs, with the stalks attached –be sure the fennel looks good when you buy it, that is fresh, which means it  does not have brown spots.
  • Extra-virgin olive oil
  • Salt and pepper to taste


How to Make this Recipe

  1. Peel the oranges, removing the pith.
  2. Slice into very thin rounds (it helps if you have a very good, sharp knife)
  3. Clean the fennel, preserving a few of the feathery fronds for decorative effect when serving
  4. Slice off the bottom of the bulb to remove the tough end, and you may want to peel off the outer layer of the bulb if the outer layer feels rubbery or wilted.
  5. As the the orange, slice the fennel bulb into very thin rounds.
  6. Now create a decorative series of layers, as our friend Amelia did with the photo shown above. She used a little bit of the lacy frond to plant a little “tree” in the center of the orange and fennel slices.
  7. Drizzle with high quality extra-virgin olive oil. If you prepare this in advance, you can drizzle with the olive oil and then cover with plastic wrap. Don’t add the salt and pepper until immediately before you serve the salad.
  8. Buon appetito!

Italiano: Finocchio e Arance

Questa meravigliosa insalata rinfrescante, è tipica del Sud Italia. Va molto bene dopo aver mangiato qualsiasi cibo pesante – maiale, pesce, qualunque cosa – per pulire il palato ed essere pronto per il piatto successivo. È una costante nella mia cena di Natale di dodici portate ed è sempre considerato uno dei migliori piatti. È facile da realizzare; Non ho mai trovato qualcuno a cui non piaccia

  • 4 – 6 arance senza semi, meglio rosse
  • 4 – 6 finocchi
  • Olio d’oliva
  • Pepe nero e sale

Preparazione

  1. Tagliare finocchi e arance come da fotografia, aggiungere un po’, non troppo olio, sale e pepe nero.
  2. Buon appetito!


Michele Carbone fried potatoes 2

The Best Fried Potatoes in the World

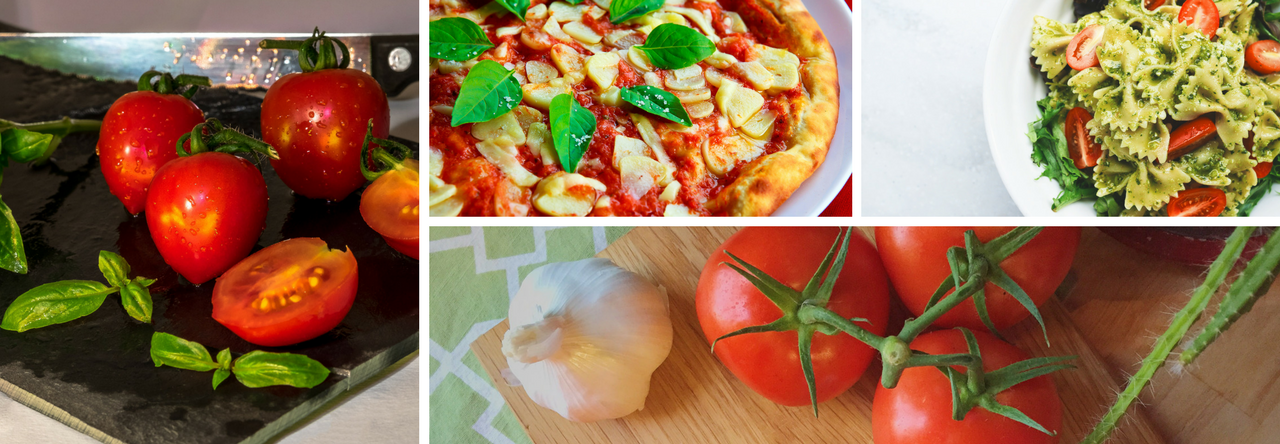
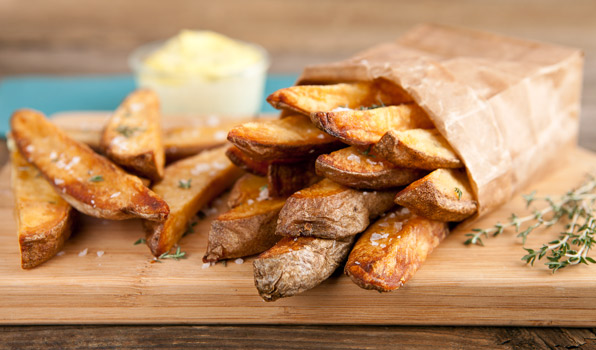
This recipe, like most of my recipes, is based on having a good extra-virgin olive oil, and fresh ingredients.  Another thing many of my recipes have in common is that they don’t feature too many ingredients.  This one, for example, just has the following ingredients:

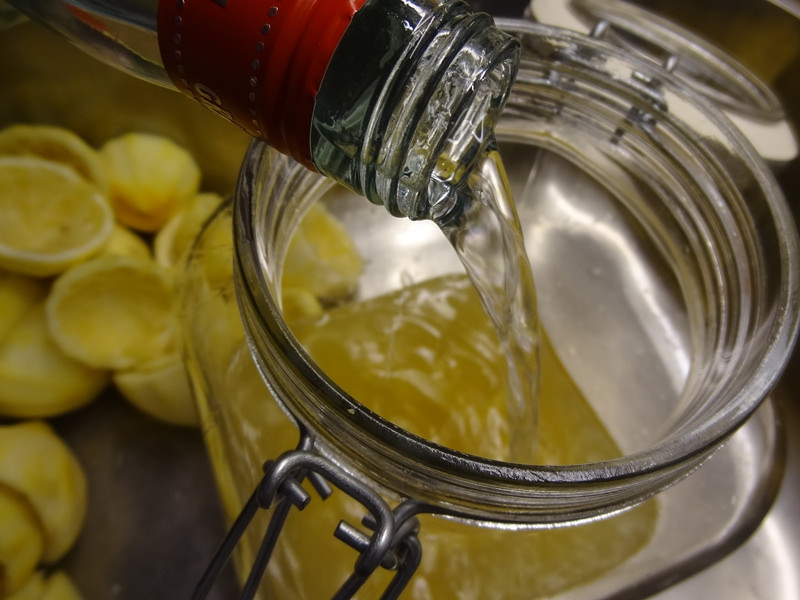
  • Extra-virgin olive oil – You will need enough oil in the pan to cover the potatoes
  • Yukon potatoes, scrubbed and with the skin on: about 1 – 2 potatoes per person
  • A sprig or two of fresh rosemary
  • Sea salt

We grow our rosemary in pots so that we can clip off springs whenever we need them.  But, if you need to buy the herb packets from your supermarket, keep in mind that you can freeze whatever you don’t use.  The color may get a little dark if the sprig has been in the freezer for a while, but it retains its fresh flavor when you use it later.

You need a pan that can handle a lot of heat, and depth which allows the potato slices to stay under the oil in a single layer when cooking.  We love using the old-fashioned cast-iron skillets for this, but you can also use any pan designed for high heat which distributes heat evenly.

This recipe is fun to cook when your guests are keeping you company in the kitchen.  Because I’m Italian, I like serving this dish as an appetizer because it’s best when the potatoes have come right out of the skillet.  But, you can also serve it at the same time you dish up an entree, such as lamb chops or steak.

Preparation:

  1. Slice the potatoes into thick strips, each one about 1 cm thick.
  2. Pour enough olive oil into your skillet/pan to cover the potatoes.  This means you may use close to a bottle of olive oil, but don’t worry — you can save the oil to re-use for this recipe another time.
  3. Heat the oil moderately high, but not enough to bubble or fry.
  4. When the oil has gotten moderately hot, carefully place the potato slices and rosemary sprigs into the skillet.  There should be enough oil to cover the slices.
  5. Cook the potatoes at moderate heat for 15 minutes, moving them gently in the skillet.
  6. Using tongs or a slotted spoon, remove the potatoes from the skillet and place them on a layer of paper towels.
  7. While the potatoes drain and cool off on the paper towels for 2-3 minutes, bring the heat up in the skillet to high.
  8. Carefully add the potatoes back into the now very hot oil.  Allow them to cook for another 8-10 minutes, moving them gently to make sure they don’t stick to the bottom.
  9. After 8-10 minutes, the potatoes should be a dark golden color.  Take one out and let it cool enough to taste it.  If you judge that it’s ready, remove the rest of the potatoes with your slotted spoon (or tong) and put them on a serving plate that has been lined with paper towels.
  10. Sprinkle the potatoes with sea salt to taste.  We’ve been using Hawaiian black sea salt to finish dishes, and we love the color and flavor, but any salt will do.  Serve immediately.


Italiano: Le migliori patate fritte del mondo

Questa ricetta, come la maggior parte delle mie ricette, si basa sull’avere un buon olio extravergine di oliva e ingredienti freschi. Un’altra cosa che molte delle mie ricette hanno in comune è che non contengono troppi ingredienti. Questo, ad esempio, ha solo i seguenti ingredienti:

  • Olio extravergine di oliva – Abbastanza per coprire le patate
  • Yukon patate –patate gialle-, con la buccia: circa 1 – 2 patate a persona
  • Uno o due rametti di rosmarino fresco
  • Sale

Noi coltiviamo il rosmarino in un vaso così è sempre a disposizione e mi piace il profumo. Ma, se lo compri a; supermercato, tieni presente che puoi congelare tutto ciò che non usi. Il colore diventerà un po’ scuro se il rametto resta nel freezer per un po’, ma mantiene il suo sapore fresco quando lo usi in seguito.

Serve una padella che possa sopportare molto calore e una profondità che permetta alle fette di patate di rimanere sotto l’olio, meglio in un unico strato durante la cottura. Le padelle in ghisa vecchio stile sono perfette per questo, ma puoi anche usare qualsiasi padella buona.

Questa ricetta è divertente da cucinare quando i tuoi ospiti ti tengono compagnia in cucina. Mi piace servirlo come antipasto perché le patate sono più buone quando sono appena uscite dalla padella.

Preparazione:

  1. Tagliare le patate a listarelle spesse di circa 1 cm.
  2. Versare abbastanza olio d’oliva nella padella per coprire le patate. L’olio puoi riutilizzarlo per questa ricetta un’altra volta.
  3. Riscaldare l’olio a una temperatura moderata,
  4. Quando l’olio sarà moderatamente caldo, mettete con cura le fette di patate e i rametti di rosmarino nella padella. Dovrebbe esserci abbastanza olio per coprire le fette.
  5. Cuocere le patate a fuoco moderato –sobbollire, per 15 minuti, muvendole delicatamente nella padella ogni 3 minuti circa.
  6. Usando una pinza o una schiumarola, togli le patate dalla padella e adagiale su carta assorbente.per 2-3 minuti.  Alza il fuoco al massimo.
  7. Rimettere le patate nell’olio bollente e cuocere per altri 8-10 minuti, muovendole delicatamente perché non si attacchino al fondo.
  8. Dopo 8-10 minuti, le patate dovrebbero assumere un colore dorato scuro. Tirane fuori una e assaggiala. Se ritieni che sia pronta, togli il resto delle patate con il cucchiaio forato (o la pinza) e mettile su un piatto da portata rivestito con carta assorbente.
  9. Aggiungi sale in abbondanza. Se usi il sale nero Hawaiiano il piatto è molto più bello (lo trovi su Amazon).\
  10. Servire immediatamente.


Image credit: http://www.cbc.ca/inthekitchen/2013/01/thick-cut-fries.html

Michele Carbone

Limoncello

(VERY EASY TO MAKE)

My favorite summertime after-dinner digestivo is the limoncello made from the lemon trees in my mother’s yard in Calabria. You can purchase limoncello in many locations in Italy and the US, but the pre-packaged bottles are never as good as the ones made from those homegrown, freshly-picked Calabrian lemons.

I’ve found that I can make a great limoncello using organic lemons from the supermarket. Of course, they aren’t quite as great as those collected in the warm sunlight of my mother’s garden, but they still make something delicious.

Even the process of making limoncello is a pleasure, because you breath in the aroma of the fresh lemon zest as you prepare it. The only problem with this recipe is that you have to steep the lemon zest in alcohol for a week – or up to three weeks (depends on the point of view). I say 1 week is all is that is needed before you finish the recipe.

Download a PDF with detailed instructions – Limoncello and Crema Recipe [Download]

Ingredients

  • 20 organic lemons, preferably less-mature lemons with a very thick skin
  • 750 ML rectified spirit, or ethyl alcohol, such as Everclear (I do not recommend the use of vodka as a substitute, that is a terrible idea)
  • 750 grams white sugar
  • 1.5 Liters water (purified or bottled)

NOTE:  The simple syrup is made with water and sugar, in a ratio of 1 liter of water to 500 grams of sugar.  If you want 2 liters of simple syrup, just double the quantities (1 KG sugar mixed with 2 liters of water).  Most Americans prefer to mix the infusion (the alcohol infused with the ethyl alcohol) at a combination of 1 liter of infusion to 2 liters of simple syrup (1:2).  My mother’s recipe is much stronger: 1 liter of infusion is combined with 1 liter of simple syrup (1:1).

Additional Supplies

  • A serrated vegetable peeler – One of the most important things about this recipe is that you need to use the lemon peel, avoiding the pith as much as possible. The pith gives the drink a bitter taste. Peeling the lemons “just so” used to be quite difficult, but now I have started using a microplane. It makes the job easy.
  • A large glass jar with a cover. The jar needs to be able to hold at least 1 liter of liquid (more if you choose to double or triple this recipe).
  • Another large glass jar that you use for the filtration process.
  • Aluminum foil to cover the jar as the limoncello steeps in the rectified spirit.
  • Glass bottles for the finished limoncello. You will need 2 1-liter bottles for this recipe.
  • A store-bought permanent coffee filter.

How to make this recipe

This is a two part process:

  1. Create the infusion of lemon zest in alcohol by zesting the lemons, putting the zest in a large jar, and pouring grain alcohol (such as Everclear) into the jar.  Cover the jar with aluminum foil and put it in a dark, cool place. Shake the jar every day for at least 7 days, and up to 3 three weeks.
  2. Once the infusion has matured, make the simple syrup of water and sugar (or alternatively, you can make a “crema” with a combination of heavy cream, milk, and sugar).  Once the simple syrup/crema reaches room temperature, you can mix it with the filtered infusion.
    1. If you have made the limoncello with simple syrup – Cover the jar again and put it in a dark cabinet…and wait at least 2 weeks, preferably 2-3 months, which causes the flavors to blend and become softer.
    2. If you have made a “crema” with the heavy cream, milk, and sugar –  Put the jar into your refrigerator and then wait for 2 weeks. You can then transfer the jar to your freezer.

Preparation

  1. Wash and dry the lemons.
  2. Peel the lemons, making sure that you avoid including the pith.
  3. Chop the lemon zest, just a little bit.
  4. Pour the 750 ml of the rectified spirits into the clean glass jar, then add the lemon zest.
  5. Place the lid on the jar, then wrap it with aluminum foil or a cloth. The reason you cover it with aluminum foil is that the process is photo-sensitive. Therefore, you want to avoid exposing it to light during the one- to three-week steeping process.
  6. Shake the jar, then place it in a cool, dry, and dark place. Some people say that it’s best to shake the bottle each day; others say just leave it alone. My mother leaves the bottle alone with a towel around it for at least one week, so I suggest you do it her way (moms know best)!
  7. After the one-to-three week steeping period, you’re ready for the next steps.  
  8. In a very clean saucepan, heat 1 liter of purified water. Add, slowly, ½ kilogram of superfine sugar to the pan and stir it until the liquid is clear, meaning that the sugar has dissolved completely, creating a supersaturated sugar mixture.
  9. Allow the sugar-water to cool in a glass container.
  10. Strain the steeped limoncello mixture. Don’t squeeze or try to push the saturated lemon zest in order to extract a few extra ml of limoncello.  
  11. Once the limoncello spirits have been filtered, mix 1:1 with the sugar-water.  

    1. NOTE:  Most people perfer a 1:2 ratio of infusion to water, which lowers the alcohol percentage.  But my mother likes it strong!
    2. Decant the limoncello into your clean glass bottles and  cap them.
      While you can drink this right away, it’s even better if you can store it in a dark place for a couple of weeks — or more — before putting it in the freezer.
    3. Italians keep limoncello in the freezer — it won’t freeze.
  • Enjoy after dinner in a shot glass. Remember that this is a highly alcoholic drink, so sip it.

Funghi Trifolati and Fricassee of Mushroom

(For 4 people, or for 1 very hungry person)

I’m in the mountains alone with my Bullmastiff and my Boxer, and tonight I cooked the “mushrooms in fricassee,” a delicious recipe that you will never find in a restaurant.  

Now the “fricassee” is just one more step after you prepare the “Mushrooms trifolati”, so the first part of this recipe will give you an excellent dish, called mushrooms trifolati, then when you want to try a variation of it, you add the fricassee.

Ingredients for 4 people

  • 1 pound of mushrooms (preferably a medley of mushroom types) sliced about 1⁄3 cm tick
  • Juice from ½ or 1 fresh lemon (depending on how much juice it makes, and how you like it)
  • 3 egg yolks, lightly beaten
  • 13 cup of extra-virgin olive oil
  • 3 cloves of garlic, crushed
  • 13 cup of finely chopped fresh Italian parsley
  • Salt and freshly ground black pepper to taste

Preparation

Make the Mushrooms Trifolati

  1. In a large non-stick skillet, gently sauté the cloves of crushed garlic in extra-virgin olive oil. Remove the garlic cloves as soon as they take on color.
  2. Adjust the heat to medium-high or high (depending on the intensity of your burners – for a family stove, high, for a professional stove, medium-high).
  3. Add the mushrooms to the skillet together with the chopped parsley. Cook on high heat for about 4 minutes, mixing them often.
  4. Add salt and freshly ground black pepper to taste. At this point, the funghi trifolati are ready to eat!

Make the  “Fricassee”

  1. Remove the skillet from the flame, add egg yolks, mixing them well.  Immediately add the lemon juice and mix well.
  2. Serve immediately.
  3. Buon Appetito!

Suggested Wine Pairing.  A good Chianti or Barbera.

Italiano: Funghi Trifolati

Per 4 persone o per 1 persona con molto appetito.

Sono in montagna da solo con il mio Bullmastiff e il mio Boxer, e stasera ho cucinato i “funghi in fricassea”, una ricetta deliziosa che non troverete mai in un ristorante.

La “fricassea” è solo un passo in più dopo aver preparato i “Funghi trifolati”, quindi la prima parte di questa ricetta vi darà un ottimo piatto, i funghi trifolati, poi se volete provare una cosa diversa, buonissima, aggiungete la fricassea.

Ingredienti

  • 450 – 500 grammi di funghi (preferibilmente un miscuglio di tipi di funghi) affettati di circa 1⁄3 cm di spessore
  • Succo di ½ o 1 limone fresco (a seconda di quanto succo produce e di come ti piace)
  • 3 tuorli d’uovo, leggermente sbattuti
  • 1/3 di cu di olio extravergine di oliva
  • 3 spicchi d’aglio, schiacciati
  • Un pugno di prezzemolo italiano fresco tritato finemente
  • Sale e pepe nero appena macinato a piacere

Preparazione

Preparazione

Prepara i Funghi Trifolati

  1. In una grande padella antiaderente, soffriggere delicatamente gli spicchi d’aglio schiacciati nell’ olio extravergine di oliva. Rimuovere gli spicchi d’aglio non appena prendono colore.
  2. Regola il calore su medio-alto o alto (a seconda della forza dei fornelli, per fornelli di cucina di famiglia, alto, per un fornello professionale, medio-alto).
  3. Aggiungere i funghi nella padella insieme al prezzemolo tritato. Cuocere a fuoco vivo per circa 4 minuti, mescolando spesso.
  4. Aggiungere sale e pepe nero appena macinato a piacere. A questo punto i funghi trifolati sono pronti da mangiare!

Crea la “Fricassea”

  • Togliete la padella dal fuoco, aggiungete i tuorli, mescolando bene. Aggiungere subito il succo di limone e continuare mescolare bene per 1-2 minuti.
  • Servire immediatamente.
  • Buon Appetito!


Powered by WordPress & Theme by Anders Norén