Michele-Carbone-New-Cover

Tag: food

Baked Pheasant

Photo from http://www.dartagnan.com/herb-roasted-pheasant-recipe.html

I went to my local grocery store in the Lake Tahoe area to buy food for dinner. As I was looking at their selection of meats and foul, I found two frozen pheasants.

This is the second recipe is for baked pheasant stuffed with Italian sausage, capers, bread crumbs, and the pheasant’s liver. This sweet/salty combination is wonderful for a special dinner on a cold night.

Ingredients

  • 3 TB of extra virgin olive oil
  • 1 egg
  • 50 grams freshly grated Parmigiano Reggiano
  • 1 TB. chopped capers
  • 1 sprig of fresh rosemary, chopped
  • 1 leaf of fresh sage, chopped
  • ¼ cup plain bread crumbs, lightly soaked in water
  • ½ cup of dry white wine (such as a Pinot Grigio)
  • Salt and black pepper
  • 1 link mild Italian sausage
  • 1 whole pheasant, chopped into 8 pieces
  • 1 additional cup white wine, used for drizzling the pheasant as it cooks in the oven.

Preparation

  1. Heat the oven to 400 degrees F.
  2. Coat the pheasant and baking pan with extra virgin olive oil.
  3. In a medium bowl, prepare the stuffing by combining the egg, Parmigiano, chopped capers, rosemary, sage, crumbled Italian sausage, liver, and bread crumbs with a ½ cup of white wine. Mix well.
  4. Using your hands, fill the chest cavity of the pheasant with the stuffing. If you know how, fill it so the abdomen and skin of the pheasant does not allow the stuffing to get out.
  5. Bake the pheasant with its stuffing for about 45 minutes, occasionally opening the oven to drizzle it with white wine.
  6. Remove the pheasant from the oven and allow it to sit for about 5 minutes.
  7. Chop into pieces and serve immediately.
  8. Buon appetito!

Suggested Wine Pairing

Try a good CiròChianti, Barbera, or Pinot Noir, but stay away from Merlot and Cabernet!

Italiano: Fagiano al Forno con Salsiccia

Sono andato al mio negozio di alimentari locale nella zona di Lake Tahoe per comprare cibo per la cena. Mentre stavo guardando la loro selezione di carni e sporco, ho trovato due fagiani congelati.

Questa è la seconda ricetta per il fagiano al forno ripieno di salsiccia italiana, capperi, pangrattato e fegato di fagiano. Questa combinazione dolce/salata è meravigliosa per una cena speciale in una notte fredda.

Ingredienti

  • 1 salsiccia italiana dolce
  • 1 fagiano intero, tagliato in 8 pezzi
  • 3 cucchiai di olio extravergine di oliva
  • 1 uovo
  • 50 grammi di Parmigiano Reggiano grattugiato fresco
  • 1 cucchiaio di capperi tritati
  • 1 rametto di rosmarino fresco, tritato
  • 1 foglia di salvia fresca, tritata
  • 120 grammi di pangrattato normale, leggermente ammollato in acqua
  • 120 ml di vino bianco secco (tipo Pinot Grigio)
  • Sale e pepe nero
  • 250 ml di vino bianco aggiuntivo, utilizzato per irrorare il fagiano durante la cottura in forno.

Preparazione

  1. Scaldare il forno a 400 F
  2. Spalmare il fagiano e la pentola da forno con olio d’oliva.
  3. Preparare il ripieno:
    • 1 uovo
    • 50 gr Parmigiano grattugiato fresco
    • Un cucchiaio di capperi tritati
    • Un po’ di rosmarino e salvia tritati
    • Circa mezza salsiccia di maiale fresca tritata, il fegato del fagiano tritato
    • Un pugno di mollica di pane ammollata nell’acqua
    • 120 ml di vino bianco
    • Sale e pepe nero
    • Mischiare, riempire la pancia del fagiano con questo ripieno ben amalgamato. Infornare per 45 minuti circa -dipende dalla forza del forno che avete- e ogni tanto bagnate con vino bianco (1 bicchiere in tutto).
  4. Tagliare il fagiano a pezzi.
  5. Buon appetito!


Flounder or Halibut With Mussels and Tomato

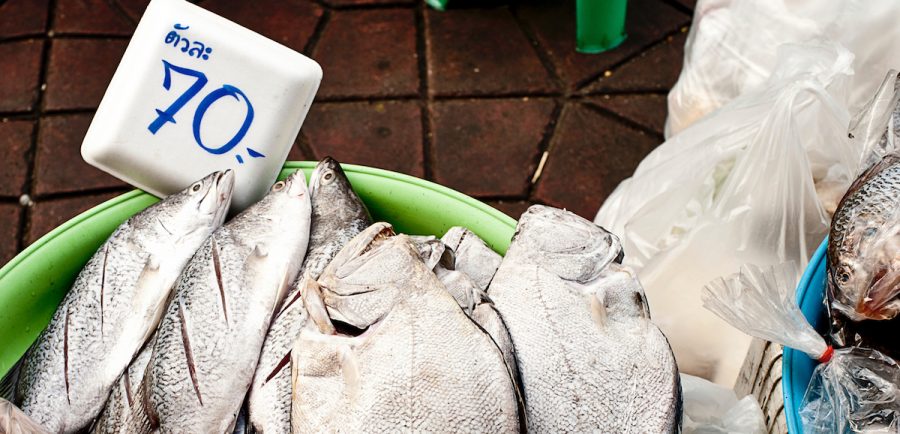
Last week, I visited one of my favorite butchers in Oak Park, IL – a place called Carnivore.  I saw a giant flounder in their fish case and decided to try it.  This recipe is the one I created for the 5.5 pound (2.5 kg) fish I bought from Ciro, the chef who works at Carnivore.

First, you’ll need a large oven, and a large roasting pan.

Ingredients (all basic ingredients you should ALWAYS have in your refrigerator)

  • 1 liter of homemade canned cherry tomatoes. Or, if you don’t can your own tomatoes, you can use a box of of Pomì chopped tomatoes (it won’t be quite as good of course, but it will still be good).
  • 12 mussels or clams
  • 12 cherry tomatoes cut in half
  • ½ cup of white wine
  • 1⁄3cup of extra-virgin olive oil
  • ½ stick butter
  • ¼ cup of flour
  • 5 garlic cloves, smashed or sliced
  • 1⁄3of a sweet onion, such as a Maui or Videlia, or green onions
  • A handful of Kalamata olives in brine
  • 1 TB. of capers
  • 1 handful of chopped Italian flat-leaf parsley
  • 1 handful of chopped fresh Italian basil
  • 1 spicy pepper, such as an Italian pepperoncino or a Thai pepper
  • Salt and freshly grated black pepper to taste

Preparation

  1. Sprinkle salt and pepper and use your hands to spread 50g (half stick) of melted butter all over the fish.
  2. Then, coat the fish with a thin layer of flour.
  3. Warm 1⁄3 cup of olive oil in the pan, then add the fish and fry on medium/high heat for just 2 minutes per side.Do not use a non-stick pan!
  4. Remove the fish from the pan and transfer it to a large roasting pan. DO NOT wash the pan you fried the flounder in, because you will continue cooking the sauce in the same pan, using the drippings as a source of delicious flavor.
  5. In the large roasting pan where you’ve placed the fish, add the canned tomatoes, white wine, olive oil, 3 smashed garlic cloves, basil and salt. Turn the fish in this sauce twice, then put in oven at 400F convection (if you do not have convection, it will take longer) for 20 minutes (Flounder) or 40 minutes (Halibut).
  6. While the fish bakes, add the following to the pan in which you cooked the fish: cherry tomatoes cut in half, mussels (or clams), onion, parsley, minced hot pepper, 2 cloves of garlic smashed, some basil, a few black olives, and a TB. of capers.
  7. Cook on high until the tomatoes become soft, stirring constantly with a wooden spoon to detach the skin of the fish that attached to the pan.  This deglazing gives a special flavor to this sauce.
  8. Take the fish out of the oven, cutting it into serving-sized pieces.
  9. Spoon the tomato-mussel sauce over the fish and serve.
  10. Buon appetito!

Suggested Wine Pairing.  Arneis, Gavi, Greco di Tufo, no more than 2 years old, cold. Some people recommend red wine with a fish soup. Taste is taste! If you like a red wine, try a good Gattinara (at least 7years old)alternatively Cirò, Chianti, Barbera, Pinot Noir, but stay away from Merlot and Cabernet!

Italiano: Passera pianuzza o halibut con cozze e pomodoro

L’altra sera, dopo aver discusso con un amico (Ciro) come farla ho cucinato una sogliola buonissima, funziona anche bene con l Halibut (un pesce piatto che pare che in Italiano si chiama Ippoglosso.

Ingredienti

  • 1 barattolo di un litro di conserva di pomodoro fatta in casa
  • 12 cozze o vongole (12 mussels or clams)
  • 12 pomodori pechini
  • 120 ml vino bianco
  • 80 ml olio d’oliva
  • Aglio
  • Burro
  • Farina
  • Aglio
  • 13 cipolla dolce
  • Olive nere
  • Capperi
  • 1 pugno prezzemolo tritato
  • 1 – 2 peperoncini piccanti tritati
  • Pepe nero e sale

Preparazione

  1. Vi serve un forno grande e una padella grande.
  2. Quantità per Sogliola di 2.5 kg.
  3. Spalmare la sogliola con un po’ di pepe nero e sale, poi spalmare usando le mani con 50 g il burro sciolto nel microonde.  Passare la sogliola nella farina, senza esagerare, e soffriggerla 2 minuti fuoco medio/alto per lato in pentola 80 ml d’olio d’oliva.Non usare pentola antiaderente! Rimuovere il pesce ma non lavate la pentola!
  4. Mettete il pesce in una pentola da forno, aggiungere la conserva di pomodoro, 1 tazzina di caffè di olio d’oliva, tanto basilico, 3 spicchi d’aglio schiacciati, sale.Girate il pesce in questa salsa un paio di volte e infornate a 400F per 20 minuti. (40 minuti per l’halibut che è più spesso)
  5. Mentre il pesce è in forno aggiungete alla padella in cui avete cucinato il pesce 12 pancini tagliati a meta`, le cozze, un pugno di prezzemolo tritato, la cipolla tritata, 2 spicchi d’aglio schiacciati, 2 peperoncini piccanti tritati, un pugno di basilico, qualche oliva e un cucchiaino di capperi.
  6. Soffriggere finché i pomodori si ammosciano, a fuoco forte rimestando continuamente con un cucchiaio di legno per rimuovere la pelle del pesce che si era attaccata alla pentola e che darà il sapore. Togliere il pesce da forno versarci la salsetta.
  7. Buon appetito!
Risotto with mussels

Spaghetti alle Cozze (for 4 People!)

Risotto with mussels

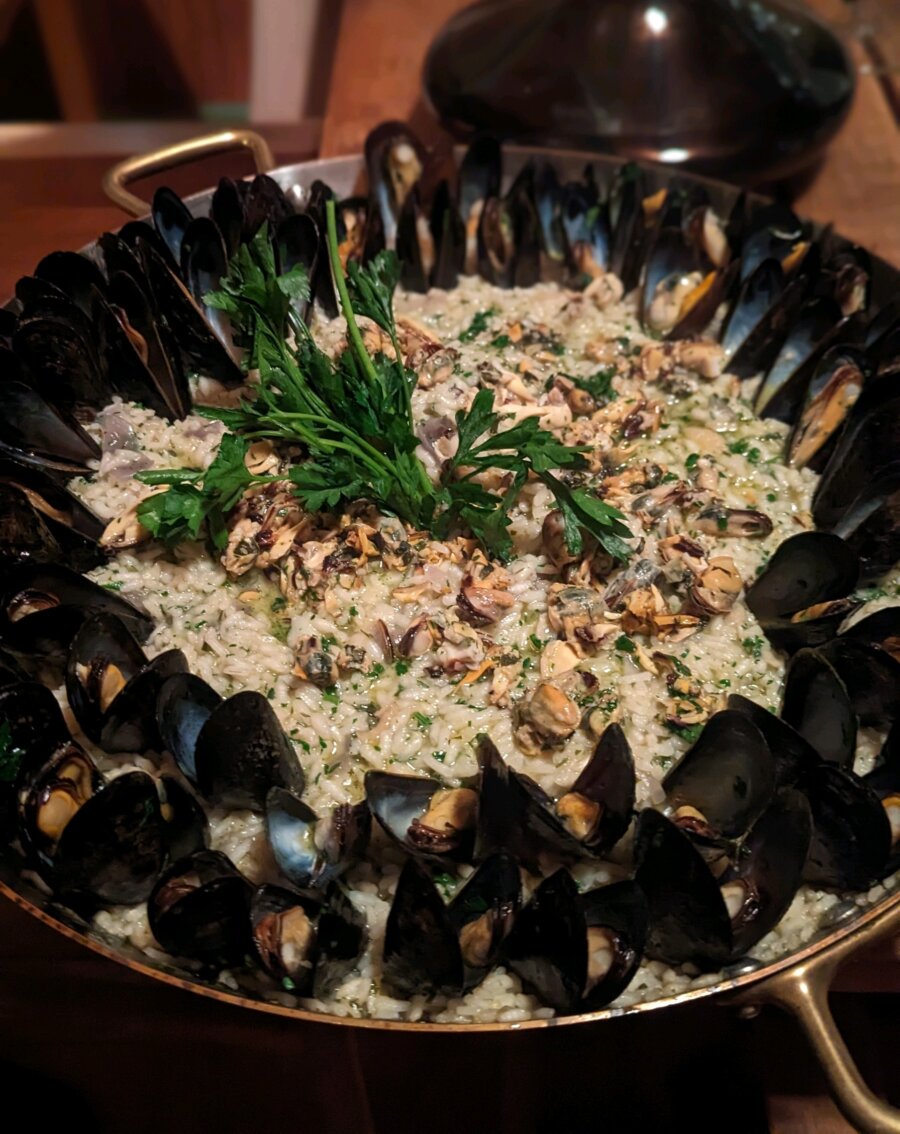
A beautiful presentation of risotto with mussels, with a parsley garnish. Photo by our friend Diana Bahrend.

This recipe features fresh mussels as the basis. You can either serve the mussels in their juices with fresh bread, or you can use the mussels in their juices as a pasta sauce for spaghetti.  See my recipe for Peppered Mussels.

Ingredients

  • About 3 pounds of mussels (or 1.5 kg of cozze) – Make sure the mussels are fresh and healthy by checking to see if their shells are close to slightly opened before purchasing.  Keep them in a pot in the fridge.  (See the recipe for Peppered Mussels, page 123).
  • 400 grams spaghetti
  • ½ cup of excellent extra virgin olive oil
  • 1 bunch of Italian parsley (flat-leaf parsley) – finely minced
  • 3 cloves of garlic, peeled and smashed into large chunks
  • 1 glass of good white wine, of course I use Italian wine
  • Salt and pepper to taste

Suggested Wine Pairing

Serve with a white wine such as an “Arneis” no more than a year old. If you prefer, you can serve it with a more crisp and less fruity wine like a Gavi, also just a year old.

Italiano: Spaghetti alle Cozze

Ingredienti

  • Circa 1,5 kg di cozze – Assicurati che le cozze siano fresche e sane controllando che i loro gusci siano chiusi o solo leggermente aperti prima dell’acquisto. Tieni le cozze in frigo.
  • ½ cup -120 ml circa, di olio d’oliva extra vergine
  • 1 mazzetto di prezzemolo italiano (prezzemolo a foglia piatta) – tritato finemente
  • 3 spicchi d’aglio, pelati e schiacciati
  • 1 bicchiere ml di vino bianco buono
  • Sale e pepe a piacere

Nota

Le cozze possono essere conservate in frigorifero in una pentola coperta con un panno umido per circa 1-2 giorni, ma rimuovete eventuali buste di plastica intorno a loro in modo che possano respirare. Pulite le cozze, se necessario, utilizzando un coltello e il pollice per rimuovere il filo.

Preparazione

  1. Cucina le cozze exactamente come le prepari per la pepata di cozze (pagina 120), fai bollire l’acqua e aggiungi 1 scatola di spaghetti.
  2. Con una schiumarola grande trasferite le cozze in una ciotola capiente (metteteci sopra un canovaccio per tenere in caldo le cozze), lasciando solo la salsa creata dalla cottura delle cozze.
  3. Circa 2 minuti prima che gli spaghetti siano completamente cotti, scolate la pasta in uno scolapasta, quindi aggiungetela nella padella contenente il sugo di cozze. Alzate la fiamma mescolando bene la salsa con gli spaghetti. Mescolate delicatamente per circa 3 minuti o fino a quando la pasta è cotta al dente (ma per favore non cuocetela troppo!).
  4. Spegnere il fuoco e mettere da parte le cozze cotte. Mescolare bene con la pasta, aggiungere un po’ di prezzemolo tritato e pepe nero e servire subito.
  5. Buon appetito!

Abbinamento Vini Consigliato: Servire con un vino bianco tipo “Arneis” di non più di un anno. Se preferite, potete servirlo con un vino più fresco e meno fruttato come un Gavi, anche di appena un anno.

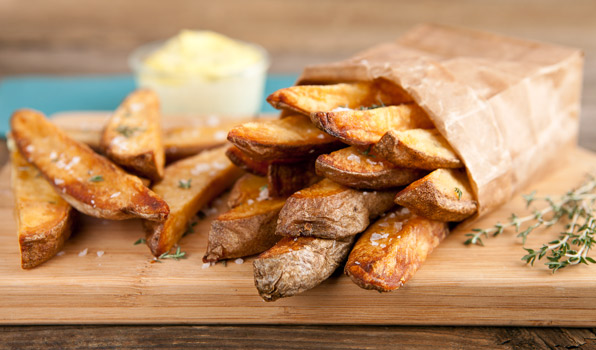
Michele Carbone fried potatoes 2

The Best Fried Potatoes in the World

This recipe, like most of my recipes, is based on having a good extra-virgin olive oil, and fresh ingredients.  Another thing many of my recipes have in common is that they don’t feature too many ingredients.  This one, for example, just has the following ingredients:

  • Extra-virgin olive oil – You will need enough oil in the pan to cover the potatoes
  • Yukon potatoes, scrubbed and with the skin on: about 1 – 2 potatoes per person
  • A sprig or two of fresh rosemary
  • Sea salt

We grow our rosemary in pots so that we can clip off springs whenever we need them.  But, if you need to buy the herb packets from your supermarket, keep in mind that you can freeze whatever you don’t use.  The color may get a little dark if the sprig has been in the freezer for a while, but it retains its fresh flavor when you use it later.

You need a pan that can handle a lot of heat, and depth which allows the potato slices to stay under the oil in a single layer when cooking.  We love using the old-fashioned cast-iron skillets for this, but you can also use any pan designed for high heat which distributes heat evenly.

This recipe is fun to cook when your guests are keeping you company in the kitchen.  Because I’m Italian, I like serving this dish as an appetizer because it’s best when the potatoes have come right out of the skillet.  But, you can also serve it at the same time you dish up an entree, such as lamb chops or steak.

Preparation:

  1. Slice the potatoes into thick strips, each one about 1 cm thick.
  2. Pour enough olive oil into your skillet/pan to cover the potatoes.  This means you may use close to a bottle of olive oil, but don’t worry — you can save the oil to re-use for this recipe another time.
  3. Heat the oil moderately high, but not enough to bubble or fry.
  4. When the oil has gotten moderately hot, carefully place the potato slices and rosemary sprigs into the skillet.  There should be enough oil to cover the slices.
  5. Cook the potatoes at moderate heat for 15 minutes, moving them gently in the skillet.
  6. Using tongs or a slotted spoon, remove the potatoes from the skillet and place them on a layer of paper towels.
  7. While the potatoes drain and cool off on the paper towels for 2-3 minutes, bring the heat up in the skillet to high.
  8. Carefully add the potatoes back into the now very hot oil.  Allow them to cook for another 8-10 minutes, moving them gently to make sure they don’t stick to the bottom.
  9. After 8-10 minutes, the potatoes should be a dark golden color.  Take one out and let it cool enough to taste it.  If you judge that it’s ready, remove the rest of the potatoes with your slotted spoon (or tong) and put them on a serving plate that has been lined with paper towels.
  10. Sprinkle the potatoes with sea salt to taste.  We’ve been using Hawaiian black sea salt to finish dishes, and we love the color and flavor, but any salt will do.  Serve immediately.


Italiano: Le migliori patate fritte del mondo

Questa ricetta, come la maggior parte delle mie ricette, si basa sull’avere un buon olio extravergine di oliva e ingredienti freschi. Un’altra cosa che molte delle mie ricette hanno in comune è che non contengono troppi ingredienti. Questo, ad esempio, ha solo i seguenti ingredienti:

  • Olio extravergine di oliva – Abbastanza per coprire le patate
  • Yukon patate –patate gialle-, con la buccia: circa 1 – 2 patate a persona
  • Uno o due rametti di rosmarino fresco
  • Sale

Noi coltiviamo il rosmarino in un vaso così è sempre a disposizione e mi piace il profumo. Ma, se lo compri a; supermercato, tieni presente che puoi congelare tutto ciò che non usi. Il colore diventerà un po’ scuro se il rametto resta nel freezer per un po’, ma mantiene il suo sapore fresco quando lo usi in seguito.

Serve una padella che possa sopportare molto calore e una profondità che permetta alle fette di patate di rimanere sotto l’olio, meglio in un unico strato durante la cottura. Le padelle in ghisa vecchio stile sono perfette per questo, ma puoi anche usare qualsiasi padella buona.

Questa ricetta è divertente da cucinare quando i tuoi ospiti ti tengono compagnia in cucina. Mi piace servirlo come antipasto perché le patate sono più buone quando sono appena uscite dalla padella.

Preparazione:

  1. Tagliare le patate a listarelle spesse di circa 1 cm.
  2. Versare abbastanza olio d’oliva nella padella per coprire le patate. L’olio puoi riutilizzarlo per questa ricetta un’altra volta.
  3. Riscaldare l’olio a una temperatura moderata,
  4. Quando l’olio sarà moderatamente caldo, mettete con cura le fette di patate e i rametti di rosmarino nella padella. Dovrebbe esserci abbastanza olio per coprire le fette.
  5. Cuocere le patate a fuoco moderato –sobbollire, per 15 minuti, muvendole delicatamente nella padella ogni 3 minuti circa.
  6. Usando una pinza o una schiumarola, togli le patate dalla padella e adagiale su carta assorbente.per 2-3 minuti.  Alza il fuoco al massimo.
  7. Rimettere le patate nell’olio bollente e cuocere per altri 8-10 minuti, muovendole delicatamente perché non si attacchino al fondo.
  8. Dopo 8-10 minuti, le patate dovrebbero assumere un colore dorato scuro. Tirane fuori una e assaggiala. Se ritieni che sia pronta, togli il resto delle patate con il cucchiaio forato (o la pinza) e mettile su un piatto da portata rivestito con carta assorbente.
  9. Aggiungi sale in abbondanza. Se usi il sale nero Hawaiiano il piatto è molto più bello (lo trovi su Amazon).\
  10. Servire immediatamente.


Image credit: http://www.cbc.ca/inthekitchen/2013/01/thick-cut-fries.html

mixed heirloom tomatoes

Canned Tomatoes – A Cooking Basic

Although many recipes are very good when you use store-bought canned tomatoes (like Pomì), they reach the next level of excellence when you can use tomatoes you have canned yourself.  My wife and I discovered this when we lived in the Chicago area, and found many varieties of beautiful heirloom tomatoes at a local farmer’s market. We found that the yellow, green, and orange heirlooms provided a lovely balance for fish recipes requiring tomato, while the red heirlooms were milder and more tasty than the store-bought tomatoes. Now, we always keep a supply of canned tomatoes on hand.

Ingredients

  • Ball mason jars and new lids (you can buy these jars at Walmart and in many supermarkets) – washed and drained
  • Fresh basil
  • Lots and lots of mature, clean tomatoes – we typically buy 50 pounds of them from the market and spend the weekend cleaning and canning.

How to make this recipe


  • Put a very large pot of water on the stove and bring it to a boil
  • Carefully drop the clean tomatoes (in batches) into the water
      1. Leave them there for a minute or two until the skin begins to split
  • Use a slotted spoon to lift the tomatoes from the water and put them on a large flat serving dish to cool
  • Do steps 2 and 3 multiple times until all the tomatoes are ready
  • Peel the tomatoes and put them into the canning jars, filling to near the top (you could also look at the instructions on the Ball Canning website
  • Add one leaf of clean, fresh basil to the jar
  • Use a wooden tool to make sure that there are no air bubbles in the jar
  • Screw on the top of the jar, finger-tight
  • Place the jars into a large pot of cold water or a pressure cooker, with at least 3 inches of water covering the jars.  
    1. You can follow the instructions on the Ball Ball Canning website for cooking.
    2. I do not follow instructions and do as I saw my grandmother did: At sea level, since the water boils, I wait 20 minutes, then I turn off the fire and leave the pot on the stove until it cools down (about 16 hours). Then you can store the jars for several years. However, the time it takes to cook the tomatoes is influenced by the altitude. So, if you live on top of a mountain, you may want to wait 30 minutes or so before turning the fire off.

Italiano:

Come fare la conserva: Tanti pomodori maturi, bollire 1-2 min appena la pelle si spacca metterli in uno scolapasta. Farli raffreddare. Sbuccciarli e metterli in barattoli di vetro per fare conserva -si vendono ovunque, precedentemente lavati in lavastoviglie -che disinfetta molto meglio che lavando a mano. Riempire fino all’olrlo e mettere una foglia di basilico fresco -togliere bolle d’aria con una forchetta. Chiudere il barattolo con gli appositi coperchi. Mettere in un grande pentolone e coprire d’acqua fredda. I barattoli devono essere interamente sommersi. Accendere il fuoco al massimo, da quando bolle, aspettare 20 min. poi spegnere il fuoco e lasciare raffreddare fino al mattino successivo. Pomodori pronti: si conservano vari anni.

Michele Carbone

Limoncello

(VERY EASY TO MAKE)

My favorite summertime after-dinner digestivo is the limoncello made from the lemon trees in my mother’s yard in Calabria. You can purchase limoncello in many locations in Italy and the US, but the pre-packaged bottles are never as good as the ones made from those homegrown, freshly-picked Calabrian lemons.

I’ve found that I can make a great limoncello using organic lemons from the supermarket. Of course, they aren’t quite as great as those collected in the warm sunlight of my mother’s garden, but they still make something delicious.

Even the process of making limoncello is a pleasure, because you breath in the aroma of the fresh lemon zest as you prepare it. The only problem with this recipe is that you have to steep the lemon zest in alcohol for a week – or up to three weeks (depends on the point of view). I say 1 week is all is that is needed before you finish the recipe.

Download a PDF with detailed instructions – Limoncello and Crema Recipe [Download]

Ingredients

  • 20 organic lemons, preferably less-mature lemons with a very thick skin
  • 750 ML rectified spirit, or ethyl alcohol, such as Everclear (I do not recommend the use of vodka as a substitute, that is a terrible idea)
  • 750 grams white sugar
  • 1.5 Liters water (purified or bottled)

NOTE:  The simple syrup is made with water and sugar, in a ratio of 1 liter of water to 500 grams of sugar.  If you want 2 liters of simple syrup, just double the quantities (1 KG sugar mixed with 2 liters of water).  Most Americans prefer to mix the infusion (the alcohol infused with the ethyl alcohol) at a combination of 1 liter of infusion to 2 liters of simple syrup (1:2).  My mother’s recipe is much stronger: 1 liter of infusion is combined with 1 liter of simple syrup (1:1).

Additional Supplies

  • A serrated vegetable peeler – One of the most important things about this recipe is that you need to use the lemon peel, avoiding the pith as much as possible. The pith gives the drink a bitter taste. Peeling the lemons “just so” used to be quite difficult, but now I have started using a microplane. It makes the job easy.
  • A large glass jar with a cover. The jar needs to be able to hold at least 1 liter of liquid (more if you choose to double or triple this recipe).
  • Another large glass jar that you use for the filtration process.
  • Aluminum foil to cover the jar as the limoncello steeps in the rectified spirit.
  • Glass bottles for the finished limoncello. You will need 2 1-liter bottles for this recipe.
  • A store-bought permanent coffee filter.

How to make this recipe

This is a two part process:

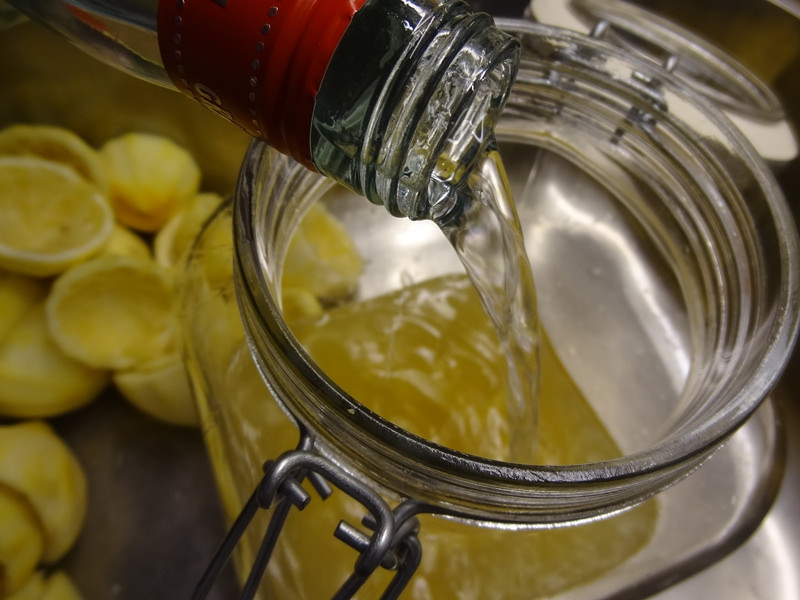
  1. Create the infusion of lemon zest in alcohol by zesting the lemons, putting the zest in a large jar, and pouring grain alcohol (such as Everclear) into the jar.  Cover the jar with aluminum foil and put it in a dark, cool place. Shake the jar every day for at least 7 days, and up to 3 three weeks.
  2. Once the infusion has matured, make the simple syrup of water and sugar (or alternatively, you can make a “crema” with a combination of heavy cream, milk, and sugar).  Once the simple syrup/crema reaches room temperature, you can mix it with the filtered infusion.
    1. If you have made the limoncello with simple syrup – Cover the jar again and put it in a dark cabinet…and wait at least 2 weeks, preferably 2-3 months, which causes the flavors to blend and become softer.
    2. If you have made a “crema” with the heavy cream, milk, and sugar –  Put the jar into your refrigerator and then wait for 2 weeks. You can then transfer the jar to your freezer.

Preparation

  1. Wash and dry the lemons.
  2. Peel the lemons, making sure that you avoid including the pith.
  3. Chop the lemon zest, just a little bit.
  4. Pour the 750 ml of the rectified spirits into the clean glass jar, then add the lemon zest.
  5. Place the lid on the jar, then wrap it with aluminum foil or a cloth. The reason you cover it with aluminum foil is that the process is photo-sensitive. Therefore, you want to avoid exposing it to light during the one- to three-week steeping process.
  6. Shake the jar, then place it in a cool, dry, and dark place. Some people say that it’s best to shake the bottle each day; others say just leave it alone. My mother leaves the bottle alone with a towel around it for at least one week, so I suggest you do it her way (moms know best)!
  7. After the one-to-three week steeping period, you’re ready for the next steps.  
  8. In a very clean saucepan, heat 1 liter of purified water. Add, slowly, ½ kilogram of superfine sugar to the pan and stir it until the liquid is clear, meaning that the sugar has dissolved completely, creating a supersaturated sugar mixture.
  9. Allow the sugar-water to cool in a glass container.
  10. Strain the steeped limoncello mixture. Don’t squeeze or try to push the saturated lemon zest in order to extract a few extra ml of limoncello.  
  11. Once the limoncello spirits have been filtered, mix 1:1 with the sugar-water.  

    1. NOTE:  Most people perfer a 1:2 ratio of infusion to water, which lowers the alcohol percentage.  But my mother likes it strong!
    2. Decant the limoncello into your clean glass bottles and  cap them.
      While you can drink this right away, it’s even better if you can store it in a dark place for a couple of weeks — or more — before putting it in the freezer.
    3. Italians keep limoncello in the freezer — it won’t freeze.
  • Enjoy after dinner in a shot glass. Remember that this is a highly alcoholic drink, so sip it.

Powered by WordPress & Theme by Anders Norén