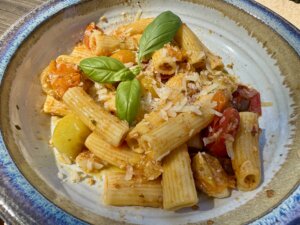
This is a beef bone broth recipe based on one shared on the New York Times Cooking site by Julia Moskin. It creates a delicious, rich broth that we use in preparing any risotto requiring a meat broth.
You need to start this recipe at least one day in advance because it requires about 12 hours of cooking time.
Ingredients
- A total of 6 lbs. of beef bones:
- 1 1⁄2 pounds bone-in beef short rib
- 3 1⁄2 pounds beef shank or oxtail (you can substitute beef knucklebones or neck bones for some of the oxtail)
- 2 tablespoons extra-virgin olive oil
- 1/2 tube of Italian tomato paste
- ¼ cup apple cider vinegar
- 3 carrots, peeled and coarsely chopped into 2-inch pieces
- 3 celery stalks, coarsely chopped into 2-inch pieces
- 2 red onions, halved and peeled
- 1 head of garlic, excess skin removed, and the top chopped off to expose the cloves
- 2 bay leaves
- 1 bunch of fresh Italian parsley
- ½ bunch of thyme
- 1 handful of dried mushrooms, preferably shitake; you can also use fresh shitake if you cannot find dried shitake (I use about 6 ounces of fresh shitake).
- 1 tablespoon black peppercorns
Preparation
Start this recipe at least one day before you plan to use it. Also, make sure you have some large freezer containers so that you can freeze the portion you don’t use. I am usually able to get at least three dinner parties worth of broth from this recipe.
- Pre-heat the oven to 350°
- Put all the beef bones into a large roasting pan, and then drizzle with the olive oil. I use a brush to coat all sides of the bones and meat, then dip the same brush into a small bowl containing the tomato paste. Lightly cover the bones with the olive oil and tomato paste.
- Place the pan, uncovered, into the oven and roast for 35 – 40 minutes.
- Once the bones are roasted, transfer the bones to a large stockpot (12-quarts).
- Pour a little cold water into the roasting pan and use a wooden spoon to mix all the remaining drippings from the bottom of the roasting pan. Pour the water mixed with drippings over the bones, then add enough cold water to cover the bones by about 3 inches. Add the vinegar.
- Bring to a rapid boil, then reduce to a simmer, leaving the stockpot uncovered. Simmer for 2 to 3 ho
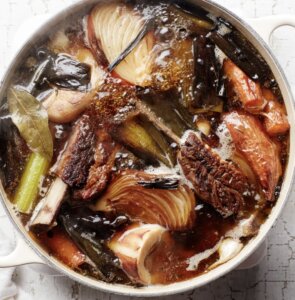
Meat broth after simmering many hours.
urs uncovered, occasionally skimming the fat from the top.
- Now add another 3-4 inches of water, along with all the vegetables and herbs. Bring to a boil, then reduce the heat to a simmer. Partially cover the pot and allow the stock to simmer for a minimum of 4 hours, but preferably overnight for 9 to 12 hours. If the broth evaporates too much, add more water, and turn down the heat.If you are uncomfortable with letting the stock go all night, you can fully cover the pot overnight, leaving the pot on the cooktop. In the morning, bring the ingredients to a boil, then uncover and reduce to a simmer for the remaining hours. The process of heating and then cooling, then heating again helps add more flavor, in my opinion.
- Allow the broth to cool.
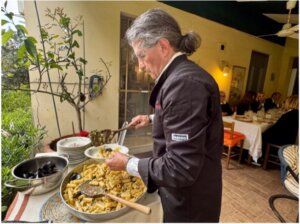
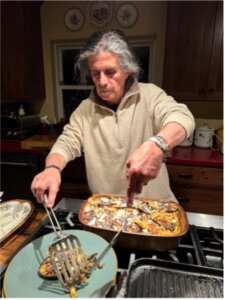
- Strain the broth from the bones and vegetables with a fine mesh sieve. If you are like my husband, you will put the beef and bones along with the carrots and celery onto a platter, then add some salt and pepper to it. It’s a great meaty dish.
Brodo di Carne (Italiano)
Questa è una ricetta per il brodo di ossa di manzo basata su quella condivisa sul sito di cucina del New York Times da Julia Moskin. Crea un brodo delizioso e ricco che utilizziamo nella preparazione di qualsiasi risotto che richieda brodo di carne.
È necessario iniziare questa ricetta almeno un giorno prima perché richiede circa 12 ore di cottura.
Ingredienti
- Un totale di 2.5 kili di ossa di manzo
- 1 kilo di costolette di manzo con osso
- 1 kilo di stinco di manzo o coda di bue (puoi sostituire parte della coda di bue con astragali o ossa del collo)
- 2 cucchiai di olio extravergine di oliva
- 1/2 tubo di concentrato di pomodoro italiano
- 60 ml di aceto di mele
- 3 carote, sbucciate e tagliate grossolanamente in pezzi da 2 pollici
- 3 gambi di sedano, tagliati grossolanamente in pezzi da 2 pollici
- 2 cipolle rosse, tagliate a metà e sbucciate
- 1 testa d’aglio, privata della pelle in eccesso e della parte superiore tagliata per esporre gli spicchi
- 2 foglie di alloro
- 1 mazzetto di prezzemolo fresco
- ½ mazzetto di timo
- 1 manciata di funghi secchi, preferibilmente shitake; puoi anche usare lo shitake fresco se non riesci a trovare lo shitake essiccato (io uso circa 6 once di shitake fresco)
- 1 cucchiaio di pepe nero in grani
Preparazione
Iniziate questa ricetta almeno un giorno prima di pensare di usarla. Inoltre, assicurati di avere dei contenitori freezer grandi in modo da poter congelare la porzione che non usi. Di solito riesco a ottenere almeno tre cene di brodo da questa ricetta.
- Preriscaldare il forno a 180°
- Metti tutte le ossa di manzo in una grande teglia e poi condisci con l’olio d’oliva. Uso un pennello per rivestire tutti i lati delle ossa e della carne; quindi, immergo lo stesso pennello in una piccola ciotola contenente il concentrato di pomodoro. Coprire leggermente tutte le ossa con l’olio d’oliva e il concentrato di pomodoro.
- Metti la teglia, scoperta, nel forno e arrostisci per 35 – 40 minuti.
- Una volta arrostite le ossa, trasferirle in una pentola capiente (12 litri).
- Versa un po’ d’acqua fredda nella teglia e usa un cucchiaio di legno per mescolare tutti i liquidi rimasti sul fondo della teglia. Versare l’acqua mescolata con i residui sulle ossa, quindi aggiungere abbastanza acqua fredda per coprire le ossa di circa 3 pollici. Aggiungi l’aceto.
- Portare a ebollizione rapida, quindi ridurre a fuoco lento, lasciando la pentola scoperta. Cuocere a fuoco lento per 2 o 3 ore senza coperchio, scremando di tanto in tanto il grasso dalla parte superiore.
Brodo di carne.
- Ora aggiungi altri 3-4 pollici di acqua, insieme a tutte le verdure e le erbe aromatiche. Portare a ebollizione, quindi ridurre il fuoco a fuoco lento. Copri parzialmente la pentola e lascia sobbollire il brodo per almeno 4 ore, ma preferibilmente durante la notte per 9-12 ore. Se il brodo evapora troppo, aggiungete altra acqua e abbassate la fiamma.
- Se non ti senti a tuo agio nel lasciare il brodo tutta la notte, puoi coprire completamente la pentola durante la notte, lasciandola sul piano cottura. Al mattino portare a ebollizione gli ingredienti, quindi scoprire e far cuocere a fuoco lento per le restanti ore. Secondo me, il processo di riscaldamento, quindi raffreddamento e successivo riscaldamento aiuta ad aggiungere più sapore.
- Lasciare raffreddare il brodo.
Filtrare il brodo delle ossa e delle verdure con un colino a maglia fine. Se sei come mio marito, metterai la carne di manzo e le ossa insieme alle carote e al sedano su un piatto, quindi aggiungerai sale e pepe. È un ottimo piatto di carne.