Michele-Carbone-New-Cover

Category: Dr. Michele Carbone Page 1 of 3

7

Rigatoni with Baccalà and Mussels for 4 to 6 People (Rigatoni col Baccalà e Cozze)

This is a phenomenal dish invented by my friends at Sora Lella, one of the best and most traditional Roman restaurants on the Isola Tiberina in the center of Roma.

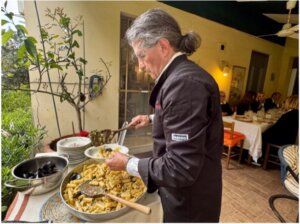
Michele serves baccalà and mussels with rigatoni.

One of Sora Lella’s best recipes is the baccalà and mussel pasta.

Ingredients

  • 500 grams of Rigatoni for 4 – 6 people
  • 3 pounds of mussels (cozze 1.3 kg)
  • ¾ pound de-salted baccalà (400 grams)
  • ½ cup grated pecorino (the best aged Roman or Calabrian pecorino you can find). The amount of pecorino varies depending on how intense it is, for a very good one ½ cup (40 grams) is sufficient, for an average pecorino, one you need double that amount/
  • 4 green scallions, finely sliced
  • Zest of 2 lemons
  • large clove of garlic, peeled and smashed
  • 4 small sprigs of fresh thyme
  • 3 tablespoons of fresh Italian parsley, chopped
  • 1 cup of white wine
  • 1 cup of extra virgin olive oil, separated
  • 2 hot chopped red peppers (Calabrian preferred)
  • Freshly ground black pepper

Preparation

  1. In a large pot, start boiling the water for the pasta.
  2. Clean the mussels.
  3. Cover the bottom of a large pot with enough olive oil to cover the bottom (about 1/8 inch of oil, or 3 mm). Heat to high, and when the oil is hot, add the peeled garlic cloves. As soon as the garlic takes on a gold color, remove it.
  4. Immediately add the mussels to the hot oil, and cover. Once the noise of the frying mussels changes, it means the mussels have opened, which usually takes about 2 to 3 minutes.
  5. Remove the cover, add 2 tablespoons of chopped fresh parsley, mix well and add one cup of white wine. Cover the pot again and remove it after 1 minute. Allow the alcohol to evaporate for 30 seconds. Immediately remove the pot from the heat—do not overcook the mussels!As long as the mussels are open, they are fine. Add black pepper, mix well. Remove mussels from the pot but reserve the liquid.
  6. Remove about 5 whole mussels in their shells and reserve them in a medium sized bowl. For the rest of the mussels, remove the mussel from the shell and chop each mussel into about 4 pieces.
  7. In a small pot, add 1/3 of a cup of olive oil and the scallions cut in thin slices and after a few minutes add some water, say ¼ of cup, cook on low heat for about 7-10 minutes., add ¼ of cup of white wine, bring the heat to high for 1 min to let alcohol evaporate. Turn heat off and add this to the larger pot containing the mussels sauce turn on fire to medium.
  8. Throw the pasta in the hot water.
  9. Cut the Baccalà in strips and put it in the pot with the mussel sauce. Add the minced hot pepper, the chopped mussels, half of the zested lemon peel, 1 teaspoon of parsley, and the thyme. Let it cook on medium for 3 minutes. Turn the heat off. Let it rest.
  10. Cook the pasta. When the pasta is very al dente, say 2 minutes less the indicated cooking time on the box, drain it, reserving some of the water. Add the al dente pasta to the pot containing the Baccalà/mussel sauce. Bring up the heat to high and cook the combined sauce and pasta for about 3 to 5 minutes, gently mixing the pasta and sauce together to allow some of the sauce to absorb into the pasta.If the sauce seems too thick, you can add some of the reserved pasta water, but it should not be necessary.
  11. Take the pot from the hot burner, add the grated pecorino, the remaining lemon zest, and a couple of tablespoons of extra virgin olive oil.
  12. Put into the pasta bowls, decorating each plate with the 5 mussels reserved in Step 6.
  13. And now, as my friends at Sora Lella would say, enjoy this “poetry”!


Two Fabulous Baccalà Recipes

Baccalà is dried salted Atlantic Cod (merluzzo in Italian), not to be confused with stoccafisso which is dried (unsalted) cod.  Authentic cod should be made using Atlantic cod, merluzzo, but at times I have seen people sell other fish (such as black cod and lingcod) under this same name, so check.  Baccalà is traditionally served in Italy on Christmas Eve and Fridays during Lent.

Here are two outstanding recipes for Baccalà. Please note that you need to start preparing baccalà three days in advance in order to remove the salt flavor from the fish.

How to De-Salt Baccalà

When you buy baccalà, you need to remove the salt before you cook it.  This needs to be done three days in advance of cooking it.

  1. Put the filets of baccalà in a large container and rinse for about an hour under a faucet that continuously drips cold water on it.
  2. Place the container full of fresh water and the Baccalà in the refrigerator. Change the water every morning and evening It will be ready the evening of the third day.

Baccalà Soup for 4 – 6 people (Baccalà in Guazzetto)

Ingredients

  • 1 lb. De-salted baccalà (500 grams)
  • ½ cup extra virgin olive oil, divided
  • 1 medium red onion, chopped
  • 2 hot red peppers (Calabrian preferred)
  • 2 cloves of garlic, peeled and smashed
  • 2 – 3 sprigs of fresh thyme
  • 1/4 tsp dried Italian oregano (this has a different flavor than the dried spice you find in most grocery stores, look for the Italian dried oregano)
  • A handful of fresh Italian parsley, minced
  • Fresh Italian basil
  • 800 grams of peeled Italian peeled whole tomatoes (the best are home canned tomatoes)
  • 1 cup of dry white wine (remember to use a decent wine for any cooking), I used Pinot Grigio
  • Salt and pepper to taste

Preparation

  1. In a large clay pot or Dutch oven (if you do not have a clay pot) place the de-salted baccalà filets with about ¼ of a cup of olive oil and thyme. Massage the thyme over the baccalà. Let it rest for at least 30 minutes while you prepare the sauce.
  2. In a medium-large pot, add enough olive oil to cover the bottom. Add the chopped red onion, 2 hot peppers, 2 peeled, smashed garlic cloves smashed, two tablespoons of chopped parsley, and about 10 whole leaves of basil. Cook on medium-high heat.
  3. Once the garlic starts to take color, add 1 cup of white wine. Cook for about a minute to allow the alcohol to evaporate, then add about 2 pounds (800 g) of canned whole Italian tomatoes (or your own canned tomatoes). Add 1 teaspoon of Italian oregano and 1 cup of cold water, one teaspoon of salt, lower the flame, and let it cook covered for 25 minutes.Uncover the pot while continuing to cook for another 5 minutes.
  4. Preheat the oven to 325F.
  5. Add the sauce to the pot containing the baccalà filets, mix well, and put in the oven for 35 minutes.
  6. Serve with a crusty fresh bread.
  7. Buon appetito!

Note: This typical Roman dish often has pine nuts and raisins added at the end. I much prefer the soup without them, but if you like them, you can add them. Also rather than cooking the Baccalà in the oven you can cook on the stovetop on low heat.

Rigatoni with Baccalà and Mussels for 4 to 6 People (Rigatoni col Baccalà e Cozze)

This is a phenomenal dish invented by my friends at Sora Lella, one of the best and most traditional Roman restaurants on the Isola Tiberina in the center of Roma.

Michele serves baccalà and mussels with rigatoni.

One of Sora Lella’s best recipes is the baccalà and mussel pasta.

Ingredients

  • 500 grams of Rigatoni for 4 – 6 people
  • 3 pounds of mussels (cozze 1.3 kg)
  • ¾ pound de-salted baccalà (400 grams)
  • ½ cup grated pecorino (the best aged Roman or Calabrian pecorino you can find). The amount of pecorino varies depending on how intense it is, for a very good one ½ cup (40 grams) is sufficient, for an average pecorino, one you need double that amount/
  • 4 green scallions, finely sliced
  • Zest of 2 lemons
  • large clove of garlic, peeled and smashed
  • 4 small sprigs of fresh thyme
  • 3 tablespoons of fresh Italian parsley, chopped
  • 1 cup of white wine
  • 1 cup of extra virgin olive oil, separated
  • 2 hot chopped red peppers (Calabrian preferred)
  • Freshly ground black pepper

Preparation

  1. In a large pot, start boiling the water for the pasta.
  2. Clean the mussels.
  3. Cover the bottom of a large pot with enough olive oil to cover the bottom (about 1/8 inch of oil, or 3 mm). Heat to high, and when the oil is hot, add the peeled garlic cloves. As soon as the garlic takes on a gold color, remove it.
  4. Immediately add the mussels to the hot oil, and cover. Once the noise of the frying mussels changes, it means the mussels have opened, which usually takes about 2 to 3 minutes.
  5. Remove the cover, add 2 tablespoons of chopped fresh parsley, mix well and add one cup of white wine. Cover the pot again and remove it after 1 minute. Allow the alcohol to evaporate for 30 seconds. Immediately remove the pot from the heat—do not overcook the mussels!As long as the mussels are open, they are fine. Add black pepper, mix well. Remove mussels from the pot but reserve the liquid.
  6. Remove about 5 whole mussels in their shells and reserve them in a medium sized bowl. For the rest of the mussels, remove the mussel from the shell and chop each mussel into about 4 pieces.
  7. In a small pot, add 1/3 of a cup of olive oil and the scallions cut in thin slices and after a few minutes add some water, say ¼ of cup, cook on low heat for about 7-10 minutes., add ¼ of cup of white wine, bring the heat to high for 1 min to let alcohol evaporate. Turn heat off and add this to the larger pot containing the mussels sauce turn on fire to medium.
  8. Throw the pasta in the hot water.
  9. Cut the Baccalà in strips and put it in the pot with the mussel sauce. Add the minced hot pepper, the chopped mussels, half of the zested lemon peel, 1 teaspoon of parsley, and the thyme. Let it cook on medium for 3 minutes. Turn the heat off. Let it rest.
  10. Cook the pasta. When the pasta is very al dente, say 2 minutes less the indicated cooking time on the box, drain it, reserving some of the water. Add the al dente pasta to the pot containing the Baccalà/mussel sauce. Bring up the heat to high and cook the combined sauce and pasta for about 3 to 5 minutes, gently mixing the pasta and sauce together to allow some of the sauce to absorb into the pasta.If the sauce seems too thick, you can add some of the reserved pasta water, but it should not be necessary.
  11. Take the pot from the hot burner, add the grated pecorino, the remaining lemon zest, and a couple of tablespoons of extra virgin olive oil.
  12. Put into the pasta bowls, decorating each plate with the 5 mussels reserved in Step 6.
  13. And now, as my friends at Sora Lella would say, enjoy this “poetry”!


Fresh Cherry Tomato Pasta Sauce

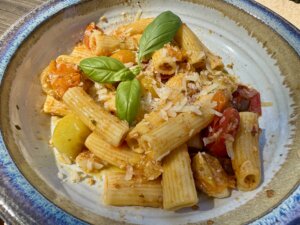
Rigatoni with cherry tomatoes

Rigatoni with cherry tomatoes

This is a pasta sauce that celebrates the fresh flavor of cherry tomatoes. It carries the sweetness of summer, along with a slight tang of acidity.

One of the advantages of this recipe is that you cook all the ingredients together at the same time and you only need to cook for 5 to 10 minutes. Thus, I usually have my pasta water boiling and start cooking the pasta at the same time I turn on the heat for the sauce.

Ingredients

  • 2 lbs. fresh cherry tomatoes, sliced in halves (I often use the “Wild Wonders brand, which combines yellow, red, green and orange tomatoes)
  • ½ bunch fresh, Italian sweet basil
  • 2 cloves garlic, peeled and smashed
  • ½ cup extra-virgin olive oil
  • Salt and pepper to taste
  • ½ cup freshly grated Pecorino (called Romano in many shops because they sell Pecorino Romano). If you do not like Pecorino, use Parmigiano instead. Both are great.
  • A box of Italian dried fusilli, penne, rigatoni, or spaghetti. A terrific brand is Rummo, which is available in many grocery stores and often low-priced.

Preparation

  1. Combine the tomatoes, basil, garlic cloves, salt, pepper, and olive oil in a medium-sized heavy-bottomed skillet (I use La Creuset).
  2. Start cooking your pasta. My preferred pasta for this sauce is the fusilli (corkscrew shape), but it works well with any type of pasta, spaghetti, rigatoni, penne etc. As soon as you put the pasta into the boiling water, start cooking the sauce by turning the heat to high.
  3. As the cherry tomatoes begin to simmer and boil, adjust the heat so that the sauce cooks gently. Stir occasionally. As soon as the tomatoes get softened, you’ve finished cooking! This usually takes about five minutes, but if you have doubled the recipe, it might take a little more time.
  4. Drain the pasta, combine with the sauce, add the cheese, and serve.

Buon appetito!

Spaghetti with Shrimp, Arugula, Tomato, and Cream

This is a quick recipe with fantastic results. It’s one of my preferred new recipes, and as you can see, I chose to serve it for a group of good friends just a few days ago. All of them loved it!

A dinner party with friends in Calabria featuring spaghetti with gamberi (shrimp), arugula, orange, and cream.

A dinner party with friends in Calabria featuring spaghetti with gamberi (shrimp), arugula, orange, and cream.

Ingredients

  • 1 box of spaghetti 500G
  • 20-25 large shrimp (4-5 per person depending how big they are)
  • ½ cup of olive oil
  • 1 clove of garlic, smashed
  • ¼ of cup parsley, minced
  • 2 – 4 hot red peppers -depending on how spicy you like to it
  • 1 box of arugula of 4 ounces (113grams), or so
  • 1 cup of chopped Italian tomatoes (Pomì or similar)
  • 1/3 of cup white wine
  • ½ cup of orange juice
  • Whipping cream


Preparation

  1. Make sure you have all the ingredients measured and ready to cook, because this is a sauce made while the spaghetti is boiling. Look at the box to see how long the spaghetti should cook: you will need to remove it from the pot about 2 minutes before it’s fully cooked, because it is finished with the sauce for the last 2 or 3 minutes of preparation, which is about 11 minutes after you have started cooking the sauce. The total cooking time is about 15 – 16 minutes from the time you have started cooking the pasta.
  2. Rinse the shrimp and slice through the back of each shell, but leave the shells on the shrimp because they add more flavor to the sauce.
  3. In a large pot for pasta, put water on to boil. Add a little to the water, if necessary, you can always add salt at the end.
  4. Soon after you put the spaghetti on the pot to cook, prepare the sauce. Use a large skillet to cook the sauce, which will take about 11 – 12 minutes before you add the al dente drained spaghetti.Put the olive oil, garlic and minced peppers, shrimp, arugola, and parsley into the skillet at the same time.  Turn the heat to high.
  5. After 2 minutes, turn the shrimp and continue to cook for another 2 minutes.
  6. Add the chopped tomatoes and wine, lower the heat to medium and cook for 2 minutes. Remove the shrimp from the skillet and put them in a covered bowl.

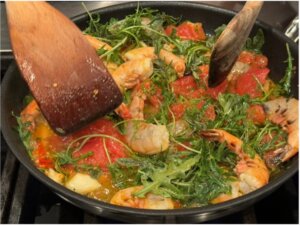
    Preparing the sauce with shrimp with arugula, tomato, orange juice, and cream.

    Preparing the sauce with shrimp with arugula, tomato, orange juice, and cream.

  7. Add the orange juice to the skillet, stirring well. Let it cook for another 3 minutes so some of the liquid evaporates. If necessary, increase the heat to high.
  8. Bring the heat to low and add the whipping cream a little bit at a time, stirring until the sauce becomes pink –not red, and not white, but pink. Let it simmer gently for another minute or so.
  9. The spaghetti that’s boiling in the pot should be very al dente (firm now). Drain it in a colander and quickly pour it into the skillet containing the sauce.  With the heat on high, stir the pasta in the sauce and cook for another 2 minutes – until the sauce is dense.
  10. Mix the reserved shrimp into the pot and serve immediately.


Italiano: Spaghetti con Rucola, Gamberi, Pomodori, e Panna

Ingredients

  • 1 box of spaghetti 500G
  • 20-25 gamberetti grandi (4-5 a persona a seconda della grandezza)
  • ½ tazza di olio d’oliva
  • 1 spicchio d’aglio schiacciato
  • ¼ di tazza di prezzemolo, tritato
  • 2 – 4 peperoncini rossi piccanti, a seconda di quanto ti piace piccante
  • 1 scatola di rucola da 4 once (113 grammi), circa
  • 1 tazza di pomodori italiani a pezzetti (Pomì o simili)
  • 1/3 di bicchiere di vino bianco
  • ½ tazza di succo d’arancia
  • Panna da montare

Preparation

  1. Assicurati di avere tutti gli ingredienti misurati e pronti per la cottura, perché si tratta di un sugo preparato mentre gli spaghetti bollono. Guardate nel riquadro per quanto tempo devono cuocere gli spaghetti: dovrete toglierli dalla pentola circa 2 minuti prima che siano completamente cotti, perché vengono cotti con il sugo negli ultimi 2 o 3 minuti di preparazione, ovvero circa 11 minuti dopo aver iniziato la cottura del sugo.  Il tempo di cottura totale è di circa 15 – 16 minuti dal momento in cui avete iniziato a cuocere la pasta.
  2. Sciacquare i gamberetti e tagliare la parte posteriore di ciascun guscio, ma lasciare i gusci sui gamberetti perché aggiungono più sapore alla salsa.
  3. In una pentola capiente per la pasta, mettere a bollire l’acqua.  Se necessario aggiungetene un po’ all’acqua, potete sempre aggiungere il sale alla fine.
  4. Subito dopo aver messo gli spaghetti in pentola a cuocere, preparate il sugo. Utilizzate una padella ampia per cuocere il sugo, che richiederà circa 11 – 12 minuti prima di aggiungere gli spaghetti scolati al dente.
  5. Mettere contemporaneamente nella padella l’olio d’oliva, l’aglio, i peperoni tritati, i gamberi, la rucola, e il prezzemolo.  Alza la fiamma al massimo. Dopo 2 minuti, girare i gamberi e continuare la cottura per altri 2 minuti.
  6. Aggiungere i pomodori tagliati a pezzi e il vino, abbassare la fiamma a una temperatura media e cuocere per 2 minuti.  Togliere i gamberi dalla padella e metterli in una ciotola coperta.
  7. Aggiungi il succo d’arancia nella padella, mescolando bene.  Lasciare cuocere per altri 3 minuti in modo che evapori parte del liquido. Se necessario, aumentare la fiamma al massimo.
  8. Portare la fiamma al minimo e aggiungere la panna un po’ alla volta, mescolando finché la salsa non diventa rosa, non rossa e non bianca, ma rosa. Lasciamo cuocere dolcemente per un altro minuto circa. Gli spaghetti che bollono in pentola dovranno essere molto al dente (sodi ormai).
  9. Scolatela in uno scolapasta e versatela velocemente nella padella contenente la salsa.  A fuoco alto, mantecate la pasta con la salsa e fate cuocere per altri 2 minuti, finché lo sugo non sarà denso.
  10. Mescolare i gamberetti messi da parte nella pentola e servire immediatamente.

Betti’s No-Knead Bread


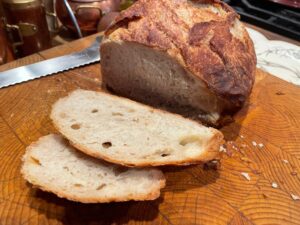
No-knead bread

Home made bread is the best!

We started making bread at home when one of our favorite shops stopped making the type of bread we preferred — a crusty loaf with an airy middle.  After searching for recipes and a fair amount of experimentation, we found that this recipe works best for us.  We make it several times a week, with an extra loaf or two before friends come over for dinner.  It’s always a hit!

  • Yield One 1 loaf of bread (1/2 lb.)
  • Time 1 hour 30 minutes, plus about 20 hours’ resting time

This recipe is largely based on Mark Bittman’s original No-Knead bread recipe, one of the most popular recipes The Times has ever published, courtesy of Jim Lahey, owner of Sullivan Street Bakery (here’s the recipe link: https://cooking.nytimes.com/recipes/11376-no-knead-bread).

While Mark Bittman’s original recipe did not require any kneading, the bread becomes airier when a small amount of kneading is done during the 18+ hour fermentation process.  See my variations on this great original Bittman recipe below.

Cooking Time

  • 45 minutes, plus 18+ hour fermentation

Ingredients if Using Active Dry Yeast

  • 430 grams all-purpose flour, plus more for dusting
  • ¼ teaspoon instant yeast
  • 2-3 teaspoons sea salt
  • 390 ml lukewarm water (between 105°F and 115°F on an instant-read thermometer)
    • I use my kitchen scale to weigh the water as I pour it into the bowl with the flour, salt, and yeast.  One ml of water weighs 1 gram, so it’s easy. I simply zero the scale after mixing the dry ingredients, then turn it on to measure 390 grams of water as I add them to the mixing bowl.

NOTE: If you are making this with all whole-wheat flour, use 420 ml of water, because the whole wheat flour needs a bit more water.

Preparation

  1. In a large glass or metal mixing bowl combine flour, yeast, and salt. Use a whisk to mix the dry ingredients thoroughly.
  2. Add the lukewarm water (105°F to 115°F) and stir with a wooden spoon until  it’s blended; the dough will be shaggy and sticky.
  3. Cover the bowl with a tight-fitting lid or with plastic wrap. Let the dough rise at room temperature for twenty minutes.
  4. Remove the lid/wrap, wet your hands with warm water from the kitchen faucet, and then reach into the bowl to pull the dough from the outside edge to the middle. Rotate the bowl as you pull the dough until you have rotated the bowl completely around (360-degree rotation), and then quickly flip the dough upside down. Re-cover the dough to prevent it from drying out.
  5. Let the dough rise another for another twenty to thirty minutes, then repeat the “pulling” process.  Repeat this “pulling process” another couple of times, for a total of 4 times.
  6. Cover the bowl and put it into the refrigerator for at between 8 to 12 hours.  You can keep it in the refrigerator up to 36 hours, but I like it best after 12 hours.
  7. Remove the bowl from the refrigerator at least 6 – 10 hours before you plan to bake the bread.
  8. Wet your fingers so the dough won’t stick to them,  and then fold the dough over itself once or twice while it remains in the same bowl in which you allowed it to rise in the refrigerator. Cover the dough loosely with plastic wrap (or with the container’s lid) and let it rest another 15 – 20 minutes.
  9. Wet your fingers again, then form the dough into a ball.  Cover the container, or loosely place plastic wrap over it if you don’t have a container, allow it to rise at room temperature for 6-8 hours, until you plan to bake it.
  10. When it is ready, the dough will be at least double in size and will not readily spring back when poked with a finger.
  11. At least a half-hour before you plan to bake the bread, heat oven to 450°F. Put a 6-to-8-quart heavy covered pot (cast iron, enamel, Pyrex or ceramic) in the oven as it heats. (This is especially important if you are using a ceramic pan because it will break if it does not heat in the oven from cool to 450°F).
  12. When the oven is pre-heated, carefully remove the heated bread pot from the oven. If you don’t have a silicone dough sling (or parchment paper) to lay at the bottom of the bread pan, sprinkle a little bit of flour on the bottom and sides of the pot to help prevent the cooked bread from sticking.
  13. Quickly wet your fings and quickly and gently lift the dough from the bowl where it’s been rising, and place the dough directly into the hot bread pan.   It may look like a mess, but that is okay. Shake the pan once or twice if the dough is unevenly distributed; it will straighten out as it bakes. Cover the pan/ceramic pot with its lid and bake for 30 minutes, then remove the lid and bake another 15 minutes (or so), until the loaf is beautifully browned.
  14. As soon as you remove the bread from the oven, remove it from the hot baking pan. Cool it on a rack (or on the cool burners of your stovetop) so that air can flow around it for at least 10 minutes.Keep in mind that bread making with a non-commercial oven requires that you adapt to circumstances such as your altitude and humidity. If you live at sea level in a humid environment, you may need to reduce the water added to the dough.  If your bread is consistently too “wet” in the middle after cooking it the usual 45 minutes, you can put it back into the oven at 350°F for another 10 minutes.  This usually resolves the problem of it being too “wet.”

Focaccia

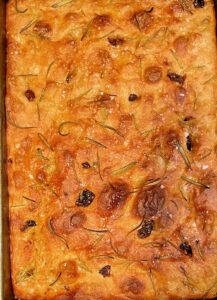
Foccacia with rosemary and sun-dried tomatoes

Focaccia with rosemary and sun-dried tomatoes

This is a recipe from Kitchen & Craft, with some very slight modifications.  Check out the excellent video posted on YouTube called Amazing Focaccia Bread | How to make it in 6 easy steps.

Even though there are a lot of steps in this process, each step is easy, and the results are fantastic.

Cooking Time

  • 35 minutes, + start at least 12 hours in advance – for example, start the dough the evening before you plan to cook the focaccia.

Ingredients for one 9” by 13” loaf of focaccia

  • Total flour:  600 grams, or 4 and ½ cups:
    You can use all-purpose flour, or a combination of all-purpose and wheat flour. In the pictured version shown here, I used 400 grams of organic all-purpose flour and 200 grams of wheat flour.
  • Warm Water, 75 – 450g (2 cups)
  • Coarse Sea Salt – 6g (3/4 tsp.)
  • Extra Virgin Olive Oil  – 20g (2 tbsp.)
  • Active Dry Yeast  – 1/4 tsp
  • Handful chopped sundried tomatoes (optional)

Toppings

  • Fresh shredded rosemary
  • Handful freshly grated Parmigiano Reggiano cheese (optional)
  • Coarse salt

Preparation

  1. Watch the video for a quick tour of the whole process.
  2. In a large bowl, combine the flour and active dry yeast. Use a whisk to mix the yeast and flour.
    • If you are adding chopped sun-dried tomatoes or chopped olives, add them now and give the flour, yeast a quick mix to distribute them through the dry ingredient bowl.
  3. In a separate, medium-sized bowl, combine the tepid/warm water with the salt. Stir to combine.
  4. Pour the water and salt into the large bowl containing the flour, active dry yeast, and the optional sundried tomatoes or olives. With a wooden spoon, mix the combined ingredients together in the bowl for a minute or two until you have a doughy ball that is slightly damp.
  5. Add the 2 tablespoons of extra-virgin olive oil, then use your hands to knead the dough for a couple of minutes. You can pinch the dough with your fingers as you gently knead it together until it forms a soft, damp ball.
  6. Coat another large bowl with a bit of olive oil and transfer the dough to the oiled bowl. Cover it with plastic wrap and allow the ingredients to rest for a half an hour.
  7. Now, for a total of 4 times, every twenty to thirty minutes, “pull” or “fold” the dough in a rotating fashion until you have rotated/folded the dough 360°. Re-cover the bowl and allow it to rest until another 20-30 minutes have passed.
  8. After you’ve completed the rotation/folding process at least 4 times, re-cover the bowl with plastic wrap and put it in the refrigerator overnight. In the morning, or a couple of hours before you plan to bake it, take the bowl out of the refrigerator.
  9. Coat a 9” by 13” baking pan  with a layer of extra-virgin olive oil. (I have have experimented with aluminum and ceramic baking pans and have concluded that the aluminum baking pans are best, because the foccacia never sticks to the bottom).   Transfer the dough into it and gently stretch the dough evenly until it is spread through the whole pan.
  10. Cover the baking pan with plastic wrap and put it into an un-heated oven with its light on. The temperature needs to be around 80- 90°F, which is generally the temperature of an oven with its light turned on. If you aren’t confident of the temperature, you can boil a small pot of water and put the steaming pot into the bottom of the oven beneath the bread. Leave the dough to proof for about an hour. This is the second proof.
  11. Remove from the oven, take of the plastic wrap, and with wet fingers, gently press into the dough to dimple it. Re-cover with plastic wrap and pop it into the unheated oven for another 45 minutes.
  12. Take it out of the oven. Bring the oven to 450° F. While the oven is pre-heating, you can finish the focaccia dough by sprinkling the top with fresh rosemary leaves. Add some sea salt on top and then sprinkle some olive oil over the entire surface (I use a plastic squeeze bottle to spread the olive oil evenly).
  13. Put the dough into the pre-heated oven. Bake for 15 to 20 minutes.
  14. Remove from the oven and put the hot pan onto the top of the stove or a rack. Allow to cool for 10 minutes and then gently remove it from the baking pan and let it sit on the rack. (If you wait too long, it will stick, and it’s a devil to get it out of the baking pan!)
  15. Add a little more olive oil to the top surface. Now — avoid temptation and let the focaccia rest on the rack for another 15 minutes.

Enjoy the results!

Confit of Cherry Tomatoes

This is one of the easiest and most delicious recipes I’ve tried. I think the reason it’s so delicious is because the flavor of the cherry tomatoes is dominant, and the combination of sweet and tart reminds us of summer days at any time of the year.  It’s great on its own, as a simple sauce for pasta, gnocchi, or a slice of crusty bread.  But it can also be used as a basis for many other recipes, including a mussel soup.

The confit can be stored in your refrigerator for up to two weeks, so I always buy several pounds of the cherry tomatoes and make a big batch. I’ve never actually made it to the two-week mark without using all the confit in one recipe or another.

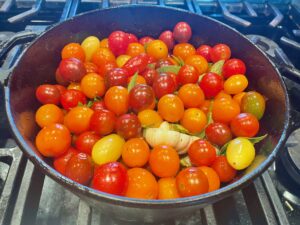
Tomatoes, basil, olive oil, and garlic

The ingredients all go into one pot at the same time.

Ingredients

  • 4 lbs. of cherry tomatoes (I use a mix of red, yellow, and orange tomatoes because they each have different levels of acidity. The brand “Wild Wonders,” available almost anywhere in the US, works very well.)
  • Good quality extra virgin olive oil
  • 2 full head of garlic, skin on, sliced horizontally
  • 2 bunches of fresh basil
  • Salt and black pepper to taste

If you want to prepare a lot, just buy more tomatoes, and use a larger casserole dish!

Preparation

Pre-heat your oven to 250° F.

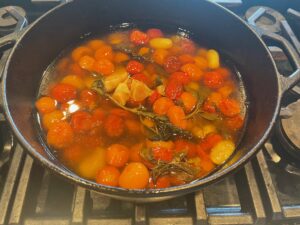
After cooking, the cherry tomatoes are still whole. the sauce is a combination of juice and olive oil.

Cooked confit of cherry tomatoes. After cooking, the cherry tomatoes are still whole. the sauce is a combination of juice and olive oil.

  1. Wash the cherry tomatoes and put them into a deep-dish casserole or a Dutch oven.
  2. Pour enough olive oil to fill about 1/3 of the casserole containing the tomatoes.
  3. Add salt and black pepper, then mix the tomatoes gently so that each one is coated with oil and the salt and pepper are distributed.
  4. Now insert the garlic heads and basil into the casserole, covering them with the tomatoes.
  5. Put the casserole into the oven uncovered and cook for about one and a half hours.
  6. Cover the dish without disturbing the contents and let them cook for another 30 minutes.
  7. Remove the casserole dish from the oven. You’ll see that the tomatoes remain whole, but a lot of the juice from the tomatoes will fill mix with the olive oil, creating a delicately flavored sauce. Allow to cool and then remove all the garlic cloves from the mixture. (Leaving in the garlic will change the flavor of the dish because it overpowers the tomatoes.) That’s it!  I like it best when I prepare the confit the day before and then refrigerate it overnight.  The flavors combine into a more subtle sauce.

Mussel Soup with Cherry Tomato Confit

This is a wonderful, fast recipe. I recently hosted a dinner party, and everyone loved it and asked for more!

Ingredients

  • Confit of cherry tomatoes (4 cups)
  • 3 lbs. fresh mussels, cleaned and bearded
  • Fresh minced parsley (as a garnish)
  • Black pepper and salt to taste
  • 1 bunch of fresh basil

Preparation

  1. In a medium-sized pot with a tight lid (for example, a 15-quart pot), add the confit of cherry tomatoes.
  2. Bring them to a gentle boil on medium heat. As soon as they start to boil, add the fresh mussels and the basil. Gently stir to combine them with the confit. Cover the pot.
  3. Allow them to boil, covered, for 3 minutes. Open the lid and stir the mixture again, trying not to break too many tomatoes. Re-cover the pot cook another 3 minutes or so – you can tell when they are ready: when they all open their shells. Be careful to avoid overcooking them!
  4. Ladle into soup bowls, sprinkle with minced parsley, and serve with a crusty bread.

Confit di Pomodori

Ricetta semplicissima, con questo sugo potete farci tante cose, di sotto suggerisco una zuppa di cozze buonissima.

Ingredienti

  • Circa 2 kg di pomodorini piccoli (latterini).
  • 2-3 mazzi di basilico, lavato e fatto a pezzetti con le mani
  • Olio d’oliva di ottima qualità
  • Sale

Preparazione

  1. Forno a 125 C
  2. Mettete i pomodori e il basilico e un po’ di sale in una pentola da forno, aggiungete olio d’oliva a coprire fino a 1/3 dalla base della pentola I pomodori -cioè tanto olio!) e infornateli scoperti per un ora e mezza, poi togliete il coperchio e cuocete per altri 30 minuti.
  3. FATTO! Vedrete che i pomodori sono ancora interi.
  4. Togliete l’aglio, poi potete farli raffreddare e conservare in frigo per 1-2 settimane, o surgelarli per uso future.

Ricetta con le Cozze

Ingredienti

  • 5 Kg di confit di pomodori
  • 5 Kg di cozze
  • 1 mazzo di basilico fresco
  • Pane di giornata

Preparazione

  1. Portate a ebollizione il pomodoro, aggiungete 1.5 Kg di cozze e un mazzo di basilico fresco, e coprite.
  2. Girate dopo 3 min, aspettate altri 3 minuti circa, appena le cozze si aprono portate a tavola e buon appetito (serve naturalmente pane fresco da intingere nel sugo).

Risotto alla Milanese

Risotto alla Milanese (with saffron)

There are many “interpretations” of this risotto. I found this recipe in an old 1950s magazine and maybe over the years I modified it a little bit.  It is one of my preferred risotto dishes, and best made together with Ossobuco (see recipe) since for an outstanding risotto you need the veal bone marrow – buccbut is excellent without it, too.

Time: it takes about 22 minutes from the time you pour the rice in the casserole pan.

Ingredients for 6 people:

  • About 500 ml of either meat broth – that is what I usually use; or chicken broth, which also works also very well. Bring to a boil before you start cooking then lower heat to a simmer.
  • 50 grams of butter and 1 TB olive oil
  • 500 grams of risotto, “Carnaroli” best, alternatively “Vialone nano.”
  • 1 medium red onion, minced
  • ½ cup dried porcini – which you will put in a cup of warm broth before you start cooking – or 50 grams or so of fresh porcini or some good fresh mushrooms cut into ½ inch thick slices
  • 1 cup of red wine (Nebbiolo grape is best)
  • About 2 grams of saffron dissolved in 1 cup of warm broth. You will dissolve the saffron before you start cooking as it takes some time to completely dissolve
  • Bone marrow from about 3-4 osso buchi
  • 1/3 cup freshly grated Parmigiano (about 50 grams); more can be grated on the plate

Preparation:

  1. In a good round pot, La Creuset, Staub, etc., or in a copper pot, melt the butter and oil.
  2. Bring the heat to medium-high and add the minced onions. As soon as they start to soften, add the risotto. While constantly stirring it, cook for about 3 minutes.
  3. Add the mushrooms, stirring constantly for 1 more minute.
  4. Add 1 cup of red wine, and allow it to evaporate almost entirely
  5. Add the hot broth, 1 ladle at time. As it is incorporated into the risotto, add more.  You need to stir continuously as the risotto, mushrooms and onions cook in the hot broth.
  6. When you are close to 20 minutes of cooking time, add the broth in which you have dissolved the saffron. How much saffron? Well different saffron have different power, so 2 grams/500 grams of rice is a suggestion that may need to be modified depending on the type of saffron you use.  Anyway it is pretty simple: The rice should turn yellow orange: if is pale yellow you need to dissolve more saffron in broth and add more, if it starts turning orange, as soon as that happens, stop adding broth with saffron and continue instead with broth without saffron
  7. Once the rice is ready –taste it to know when is ready–add the bone marrow, mix well, turn off the heat and move the pot on a cold burner.  Add the Parmigiano, mix well, taste for salt and eventually add more as needed (it depends if the broth had or did not have enough salt).  Black pepper? Tell your guests to add it if they like.
  8. Buon appetito!


Italiano: Risotto alla Milanese

Tante “intepretazioni” questa ricotta l’ho trovata in una vecchia rivista degli anni 50 a casa dei miei nonni, l’ho copiata e probabilmente modificata un po’ nel corso degli anni.  È uno dei miei risotti preferiti.  Suggersco di offrirlo insieme all’ossobuco, perchè per un risotto alla Milanese perfetto serve un po di midollo di vitello, ma va bene anche senza, non perfetto, ma ottimo.

Tempo: Ci vogliono circa 22 minuti dal momento in cui buttate il riso in casseruola.

Ingredienti per 6 persone:

  • Circa mezzo litro di brodo di carne o se non lo avete di pollo che mettete sul fuoco finchè bolle, poi abbassate al minimo
  • 50 grammi di burro e 1 cucchiaio di olio d’oliva
  • 500 grammi di risotto, “Carnaroli” oppure “Vialone nano”.
  • 1 cipolla media a pezzettini
  • 1-2 pugni di porcini secchi messi a mollo in circa 200 ml di brodo tiepido
  • meglio circa 50 grammi di porcini freschi o altri funghi buoni a pezzetti
  • 1 bicchiere vino rosso (nebbiolo meglio)
  • Circa 2 grammi di zafferano dissolto in circa 250 ml di brodo tiepido –ci vuole un po perchè i dissolva perciò mettetelo a dissolvere appena cominciate, quando mettete il brodo a scaldare.
  • Il midollo di 3-4 ossi buchi
  • Circa 50 grammi di parmigiano –poi chi vuole ne mette altro


Preparazione

  1. In una buona pentola rotonda, La Creuset, Staub, etc., o di rame, squagliate il burro con olio –fuoco basso.
  2. Alzate il fuoco e aggiungete cipolla a pezzetti e riso girando costantemente, 3 minuti.
  3. Aggiungete i funghi, girare 1 altro minuto.
  4. Aggiungere 1 bicchiere vino rosso fare evaporare quasi completamente.
  5. Aggiungere 1 mestolo di brodo per volta fino a cottura – circa 20 minuti.
  6. Quando il riso è quasi cotto, 5 minuti prima di spegnere il fuoco, aggiungere il brodo in cui avete dissolto lo zafferano. Quanto zafferano? Quando il riso è giallo/arancione (colore mandarino) è la quantità giusta: se è solo giallo serve più zafferano, come diventa un po’ arancione, fermatevi.
  7. Quando il riso è quasi pronto aggiungere il midollo di vitello che avrete preso dagli ossibuchi mischiare, spegnere il fuoco spostare la padella su fornello freddo aggiungete il parmigiano e mischiate. Sale? Dipende se il brodo lo aveva, comunque assaggiate e se necessario aggiungetelo. Pepe nero? Un po’ ci sta bene, ma fate fare ai commensali a gusto proprio.
  8. Buon Appetito.


My Favorite Roasted Rabbit Recipe

Roasted Rabbit

One day a few years ago, my wife Betti called me from Whole Foods. “They have frozen rabbit,” she said. “Didn’t you tell me that you wanted to cook something different?”  I told her to buy it, and then began looking through my cookbooks for a good recipe.

After going through several of my favorite books, including the one my mother gave me in college (Il Cuoco Gentiloumo), I decided that none of them were quite right.  I decided to create my own recipe, and it turned out to be one of my best.

Ingredients

  • 1 rabbit cut in 8-12 pieces (ask the butcher to do it if you do not know how)
  • Extra virgin Italian olive oil
  • 1 green bell pepper, sliced into in 8 wedges
  • 1 large ripe tomato, Heirloom preferred, sliced into 8 wedges
  • 2 teaspoons of capers
  • 2 tablespoons of good-quality green olives (pitted)
  • 5 cloves garlic
  • 1 bunch of Italian parsley
  • 4 bay leaves
  • 1 bunch of basil
  • 2 sprigs of fresh rosemary, just the leaves
  • ¾ of a cup white wine
  • Juice from 3 lemons
  • Balsamic vinegar, ¼ of a cup
  • ½ cup all-purpose flour
  • 1 hot spicy pepper


Preparation

  1. Marinate the rabbit with:
    • 1/3 of cup olive oil
    • 3 cloves of garlic, smashed
    • The juice of 3 lemons
    • 2 sprigs of rosemary –needles only
    • 8-10 basil leaves
    • The green bell pepper in 8 pieces
    • Salt and black pepperTurn the pieces over every 20 minutes or so, for about 1 hour.
  2. Start oven convection roast 475 – 480 F
  3. In a roasting pan, or Dutch oven (for example, Staubb or Le Crueset), add 1/4 cup of olive oil, 1 minced red pepper (for example, a Calabrian red pepper or a Thai pepper), 2 cloves of smashed garlic, some coarse salt. Add the rabbit pieces and half of the marinade.
  4. Cook for 10 minutes on high, mixing every so often to brown the rabbit.
  5. After 10 minutes, add the rest of the marinade and continue to brown for 5 more minutes.
  6. In the meantime, get a medium sized bowl and mix together ¾ of a cup of white wine, ¼ of cup of balsamic vinegar. Add half of the remaining minced parsley.
  7. Remove the pan from the fire, and add ½ cup of flour, the wine and balsamic vinegar mix, and 1 cup of water to the pan. Mix the liquid well and then add the slices of tomato and the rest of the parsley.  Put the pan into the oven and lower the heat to 400 F.
  8. After 15 minutes, add the 2 teaspoons of capers and the 2 tablespoons of green olives. Cook for 5 more minutes.The total roasting time is 20 minutes, or 25 minutes if you cook a large rabbit or double this recipe.
  9. Remove from the oven, sprinkle with the remainder of the minced parsley, a handful of fresh basil and serve with excellent, crusty bread.
  10. Buon Appetito!


Italiano: Coniglio di Miguel

Ricetta che ho inventato perché tutte quelle che trovavo non mi piacevano.  È venuto il miglior coniglio che ho mai mangiato e da allora è uno dei miei piatti preferiti.

Ingredienti

  • 1 coniglio intero tagliato in 8-12 pezzi. Se non sapete tagliarlo chiedete al macellaio di farlo per voi
  • Olio extravergine di oliva italiano
  • 1 peperone verde, tagliato in 8 spicchi
  • 1 pomodoro grande maturo, preferito Heirloom, tagliato in 8 spicchi
  • 2 cucchiaini di capperi
  • 2 cucchiai di olive verdi di buona qualità (denocciolate)
  • 5 spicchi d’aglio
  • 1 mazzetto di prezzemolo italiano
  • 4 foglie di alloro
  • 1 mazzetto di basilico
  • 2 rametti di rosmarino fresco, solo le foglie
  • ¾ di bicchiere di vino bianco
  • Succo di 3 limoni
  • Aceto balsamico, ¼ di tazza
  • ½ tazza di farina per tutti gli usi
  • 1 peperoncino piccante

Preparazione

  1. Mettere il coniglio a marinare per circa 1 ora in una pentola con: 3 limoni spremuti, 3 spicchi d’aglio schiacciati, ½ tazzina di caffè di olio d’oliva, 1 peperone verde tagliato in 8 pezzi, 4 foglie di lauro, 1 rametto di rosmarino (solo gli aghi), un pugno di basilico, sale e pepe nero. Girare ogni 20 minuti circa.
  2. Accendere forno a 250C.
  3. In una buona pentola di alluminio o di ferro, 1/3 di tazzina di caffè d’olio d’oliva, 1 peperoncino piccante, quelli calabresi sono i migliori, 2 spicchi d’aglio schiacciati, un po’ di sale grosso. Aggiungere il coniglio e mezza marinata, fuoco forte fate rosolare per 10 minuti.
  4. Passati 10 minuti, aggiungete il resto della marinata e continuate a rosolare per 5 minuti a fuoco forte.
  5. Preparate 1 bicchiere 3/4 di vino bianco 1/4 di aceto balsamico e tagliate in 4 pezzi un grosso pomodoro. Tritate 1/2 mazzetto di prezzemolo.  Prendete la farina.
  6. Spegnete il fuoco, aggiungete due pugni di farina, il bicchiere vino e aceto, e lo stesso volume di acqua, rimestando per sciogliere la farina, aggiungete metà del prezzemolo e il pomodoro a pezzi, infornate scoperto abbassando il forno a 200.
  7. Dopo 15 minuti aggiungere 2 cucchiai di capperi e due di olive verdi (buone non olive in barattolo.) Infornate per altri 5 minuti (tempo totale in forno 20 minuti che diventane 25 se il coniglio è grosso o se state cuocendo due conigli).
  8. Togliere dal forno spruzzarci sopra un po di prezzemolo, e basilico fresco e buon appetito!

Tiramisu by Betti

Tiramisu is one of the classic Italian desserts, a delicious combination of cream, coffee, sugar and egg.   A good tiramisu is difficult to find, but I’ve been able to prepare this one for very large crowd…just a little piece goes a long way!

Tiramisu

A delicious slice of tiramisu

This is based on Giancarlo Gottardo’s recipe, but it has less sugar and  adds whipped egg whites to the custard for the tiramisu.

I also add a chocolate-flavored rum to the zabaglione (custard) that is the basis for the tiramisu. The alcohol in the rum cooks off, but it leaves a delicious flavor.

The tiramisu has a layer of custard on the bottom, topped by a layer of coffee-dipped ladyfingers, with another layer of custard, another layer of coffee-dipped ladyfingers, and then topped with a final layer of custard sprinkled with powered chocolate.  This recipe makes enough of the custard for a 13.5 inch by 9 inch  rectangular baking pan.

Because it’s so rich, a small piece is just right, and this recipe can serve 40 people easily.  That said, I always give the leftover tiramisu from a smaller gathering to my mom, who eats a couple of pieces each day for almost a week.  She assures me that the tiramisu seems to get better with each passing day.  So don’t worry, even if this seems like a lot of tiramisu, none will go to waste.

When you assemble the ingredients, you need to make sure that you make each part separately and then combine them quickly into the baking pan.

Make the recipe one day in advance so that the ingredients combine together fully before serving it.

Ingredients

  • 5 egg yolks, with 3 TB sugar for the zabaglione
  • 3 egg whites, with 3 TB sugar (or just use all 5 egg whites, using 1 TB sugar for each). You can reserve the extra whipped egg whites for your coffee the following morning.
  • 2 cups heavy cream
  • ¼ tsp vanilla extract
  • 2 packages of ladyfingers: You need enough to create two layers of ladyfingers in the baking pan
  • 3/4 cup fresh espresso, mixed with 2 TB sugar. You can optionally add 1/4 cup of chocolate-flavored rum to the coffee if you are okay with serving a dessert that has a small amount of alcohol in it.
  • 2 cups of mascarpone
  • 1/4 cup of chocolate-flavored rum (optional) for the zabaglione, plus an additional 1/4 cup that you can add to the coffee if you are okay with
  • 1/4 cup of ground dark chocolate (I use my coffee bean grinder to create the powder that dusts the top of the tiramisu)

Preparation

You will need several large mixing bowls ready for this recipe, as well as space in your refrigerator to store each bowl as you complete the steps below.  I have found that it’s best to start with the zabaglione, then whip the heavy cream, followed by the whipped egg whites.

Start by taking the two cups of mascarpone from the refrigerator so that they are at room temperature when you mix everything together.

Espresso

  1. Make 3/4 cup espresso and add 2 TB sugar. You an optionally add about 1/4 cup of chocolate-based rum, if you and your guests are okay with having some alcohol in the dessert.  If you prefer it non-alcoholic, make about 1 cup of espresso.
  2. Refrigerate until you need to assemble the tiramisu.

Zabaglione

The zabaglione is the egg-yolk-based custard that is key to making an excellent tiramisu.  You need to be prepared to devote at least 15 minutes of your full attention – and both hands – to the process of making zabaglione.  Turn off your phone, make sure you are listening to some good music!

  1. Prepare a Dutch boiler by putting water high enough to cover the bottom of the inserted pan. If you don’t have a Dutch boiler, select a pot that can hold a heavy Pyrex bowl comfortably, with the bottom part of the bowl immersed in the water.It’s best if you have a pan or bowl with a curved bottom, because you will need to whisk the eggs and sugar, and the curved surface makes the task easier and prevents sticking.
  2. Turn on the heat to medium/medium high to start heating the water. In the top pan, combine the 5 egg yolks with 3 TB sugar. With a large whisk, begin whisking the egg yolks and sugar, as the water comes to a light boil/simmer.You want to regulate the heat so that the water doesn’t boil too hard.  The goal is to make sure that the zabaglione cooks into a thick sauce over the next several minutes.
  3. Using a whisk, rapidly froth the egg yolks and sugar. Continue mixing over the Dutch oven for about 10 – 14 minutes. If you wish to add the chocolate-based rum, add it in 2-3 increments as you continue to whisk the eggs, sugar, and rum.If you don’t add the rum, add about 1/4 cup of the boiling water in small increments.
  4. When the mixture becomes thick, like a mayonnaise, the eggs have become pasteurized, and the zabaglione is ready.
  5. Remove the top part of the Dutch oven (or the Pyrex bowl) from the heat and continue to whisk for a couple of more minutes. This allows the custard to cool down and become slightly thicker.  Once it has cooled to a tepid temperature, you can stop whisking and place the bowl/pan you’re your refrigerator while you prepare the rest of the ingredients.

Whipping Cream

  1. In a cold mixing bowl, add the whipping cream and vanilla extract.
  2. Mix until the whipping cream is light and fluffy.
  3. Put into the refrigerator. Clean the blades on your blender before starting the next step.

Egg Whites

  1. Just before combining ingredients for the tiramisu, make the egg white mixture. In a mixing bowl, add the 3 egg whites and 3 TB sugar.
  2. Whip until the egg whites form stiff peaks.

Combining All Ingredients

  1. With a silicon/rubber spatula, lightly fold—by hand—the mascarpone with the whipping cream in your largest bowl. Do not overmix – the mixture should be a combination of lumpy and fluffy, like summer clouds.
  2. Now fold the zabaglione mixture into the combined mascarpone/whipping cream.
  3. Next, gently fold approximately 1/2 to 2/3 of the whipped egg whites into the mixture.
  4. Spoon a layer of the zabaglione/mascarpone/egg white mixture into a rectangular baking pan.
  5. Now add the first layer of coffee-soaked ladyfingers. I usually line up the ladyfingers, a flat-bottomed bowl containing the coffee, and the rectangular baking pan.Working quickly, one ladyfinger at a time, I dip a ladyfinger into the coffee, then place it gently on the layer of custard.  I create a layer of ladyfingers, lined up like little soldiers, over the custard.
  6. Add a layer of custard over the ladyfingers.
  7. Next, add a second layer of ladyfingers, following the same process as above – dip each ladyfinger in coffee, then gently place it over the custard in the baking dish.
  8. Layer the last of the custard over the ladyfingers.
  9. Sprinkle the powdered chocolate over the top of the pan.
  10. Cover with aluminum foil and place in the refrigerator at least 8 hours to allow the custard to set.


Page 1 of 3

Powered by WordPress & Theme by Anders Norén